Managing Categories
The Categories feature in Scantranx helps you organize products into logical groups, making inventory management and product searches faster and more efficient.
Categories aremust usedbe created before adding products to categorize the productsinventory to ensure that each product is properly classified. However, some default categories are already available in the inventory. These must be added before adding productssystem to thehelp inventory.you However,get somestarted.
By categorizing your products, you can:
Tip: Create clear and specific categories
already(e.g.,existElectronics,inBeverages,theClothing)system.to make it easier for both staff and customers to locate items quickly.
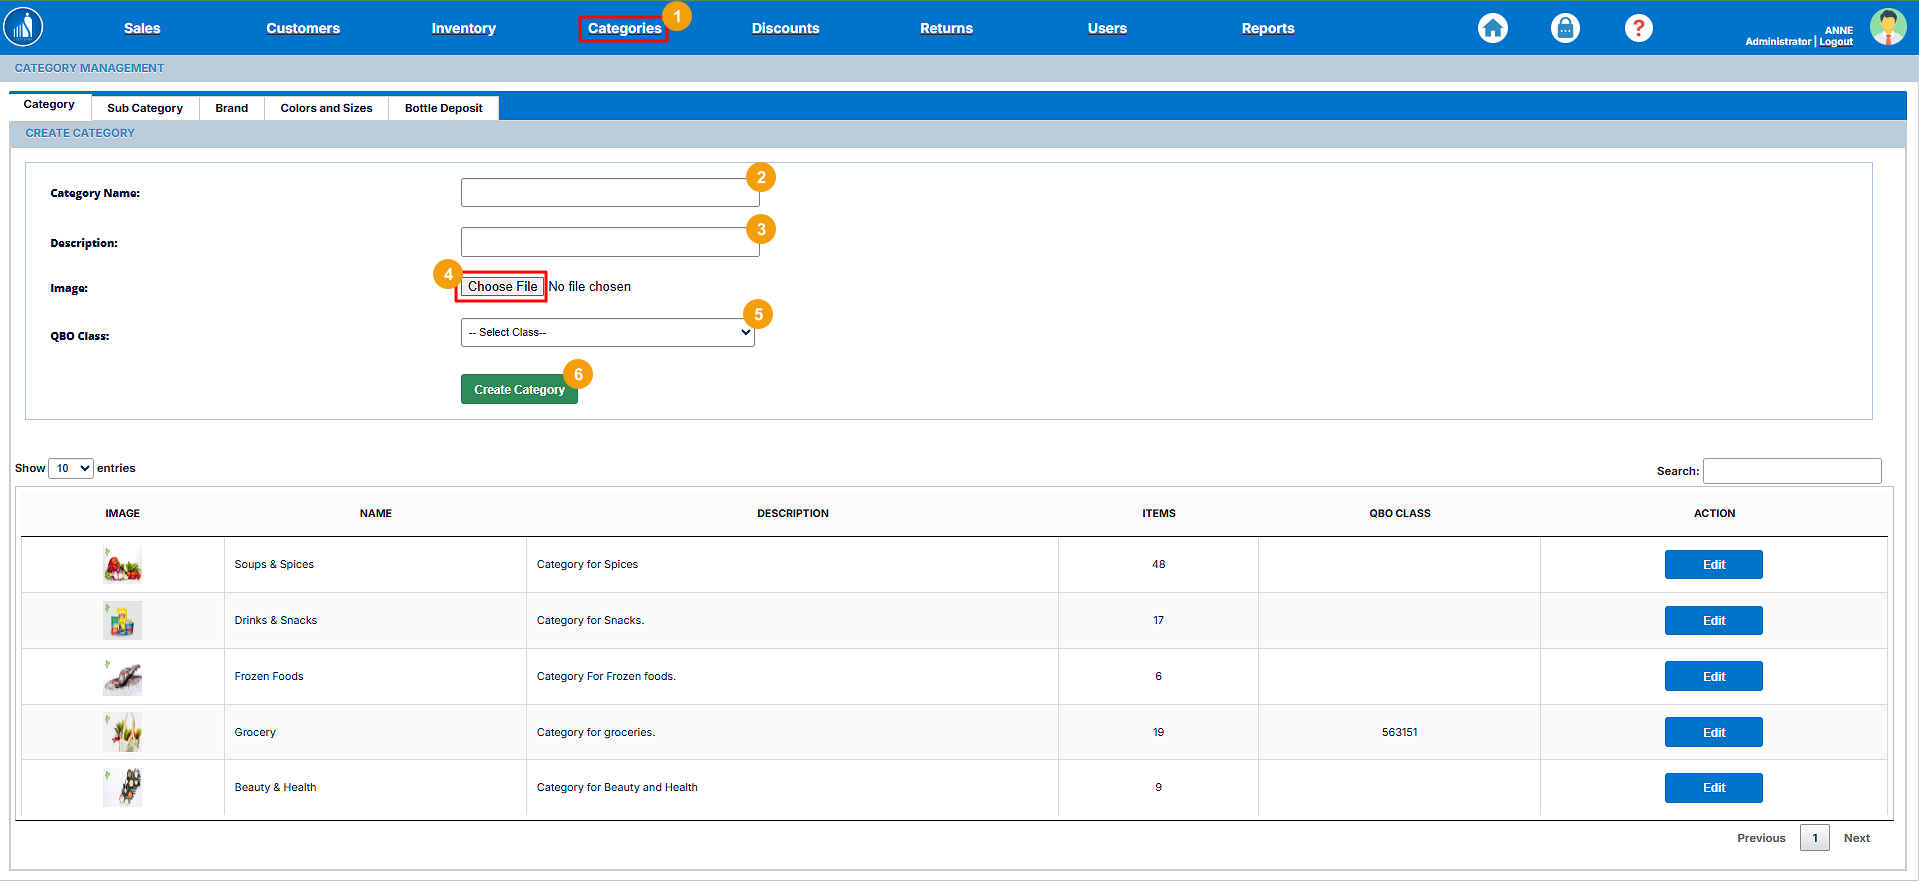
How to Create a New Category?Category
1.Creating categories helps organize your products for easier management and reporting. Each category can include a name, description, and image to help visually identify product groups across the POS and online store.
To create a new category:
-
Go to the Categories tab.
-
2. -
3. -
4.UploadUploada Category Image to represent thecategorygroupimage.visually. -
5.class.(if you have integrated QuickBooks Online). -
6.HitClick Create Category.to save it.
Tip: Use high-quality images and clear category names to make your inventory and online store easier to navigate. Consistent naming helps improve search results and reporting accuracy.
How to Edit an Existing Category?
Category
1.You can easily update category details such as name, description, or image to keep your inventory organized and up to date.
To edit an existing category:
-
Go to the Categories tab.
-
2.beforenext to the category you want toedit.modify.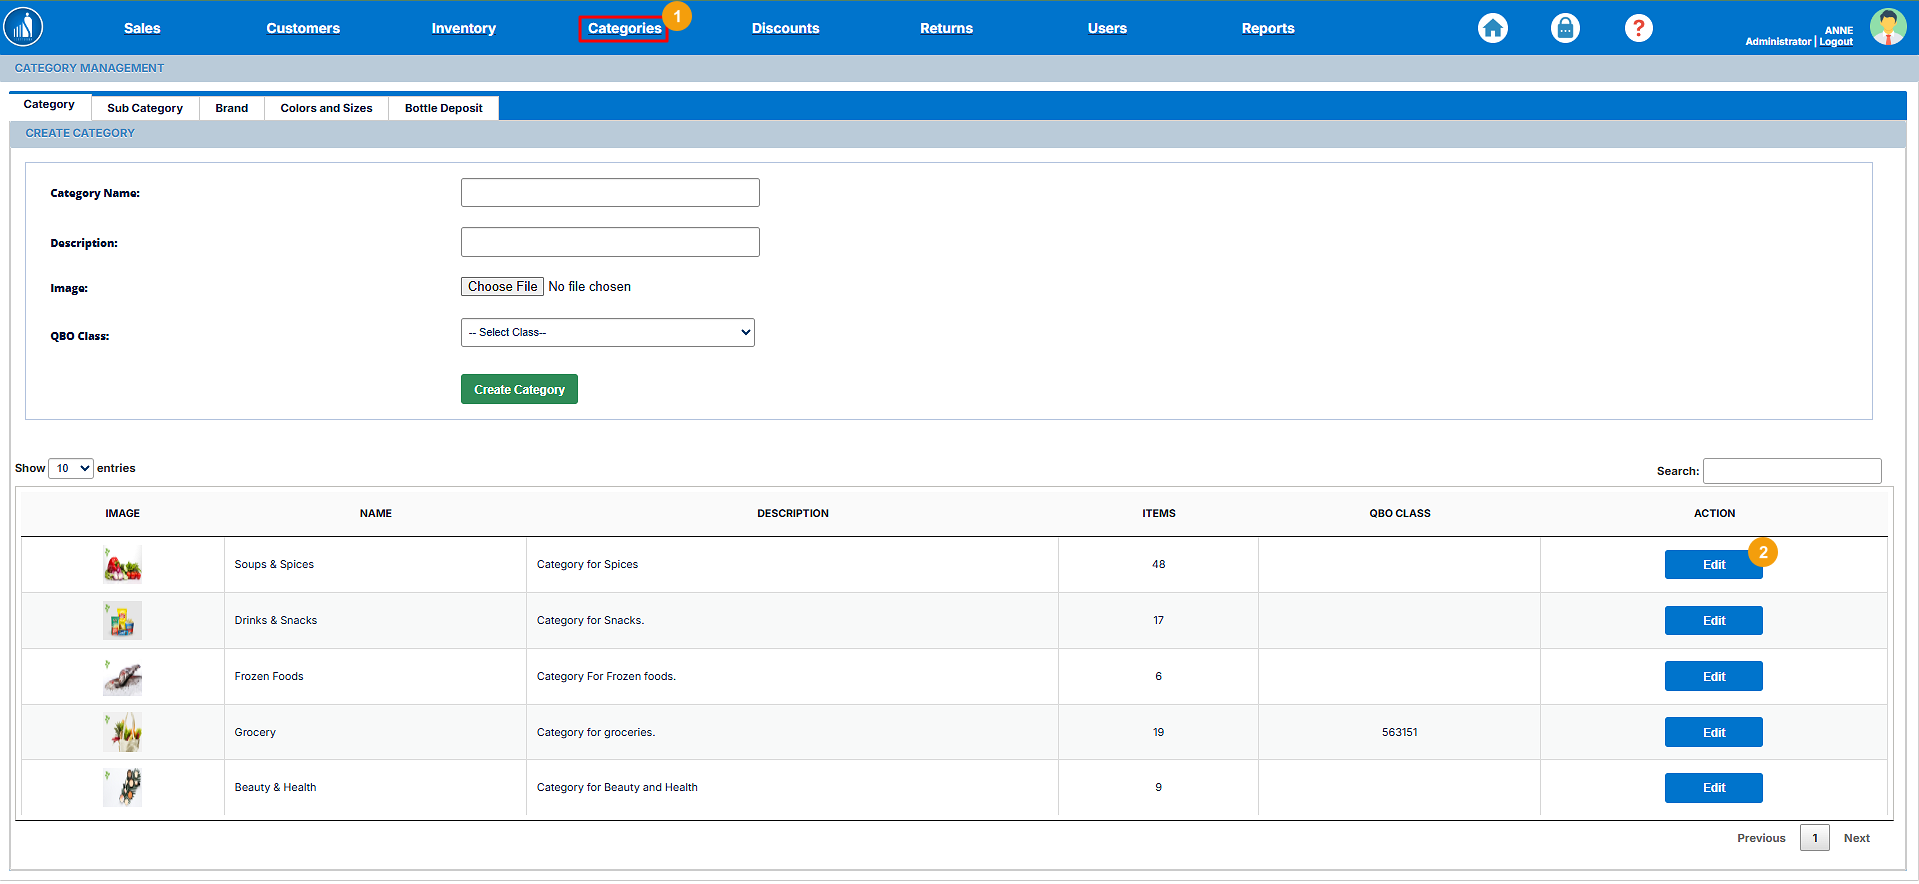
-
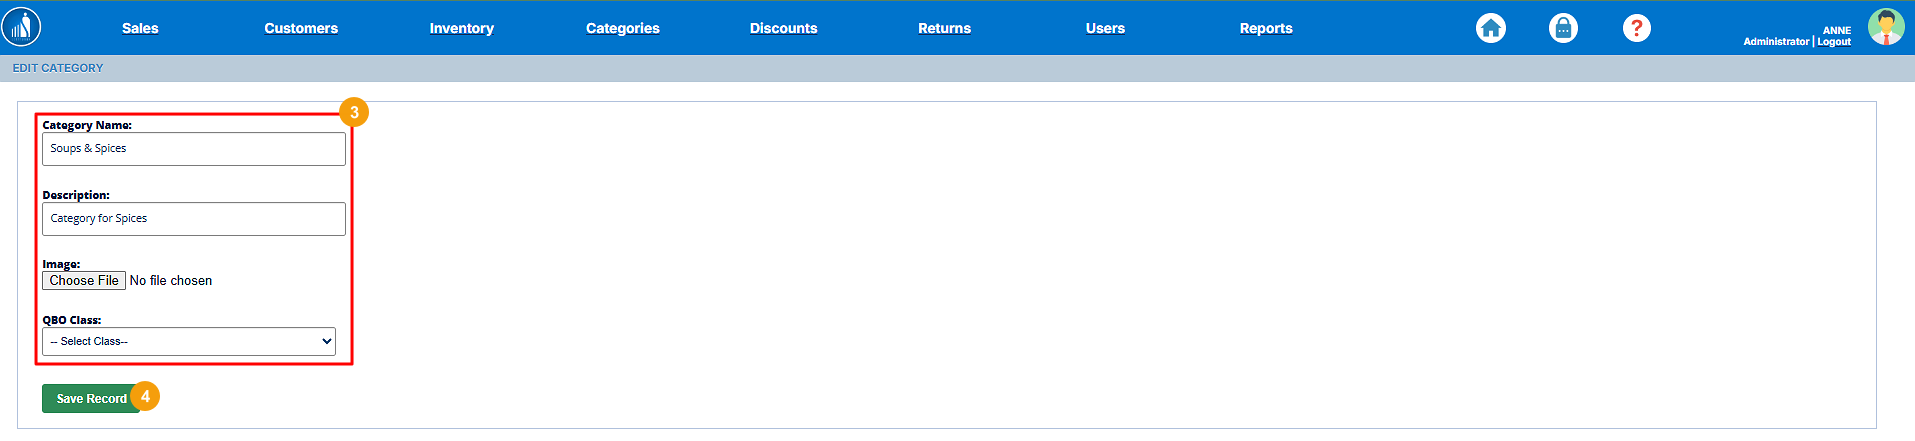
3.MakeMakethe necessary changesto(e.g., update thecategory.name, description, or image). -
4.HitClick Save Record.to apply the changes.
Note: Keeping categories accurate and well-structured ensures smoother product management, reporting, and online catalog organization.
Besides categories, you can addalso sub-categoriescreate Subcategories to further classify your products. Subcategories help specify theproduct productstypes further.within a larger category — for example:
-
Category: Electronics
-
Subcategory: Mobile Phones, Laptops, Accessories
Tip: Use subcategories for better product filtering and reporting, especially if you manage a wide product range.
Category: Electronics
Subcategory: Mobile Phones, Laptops, Accessories
Tip: Use subcategories for better product filtering and reporting, especially if you manage a wide product range.

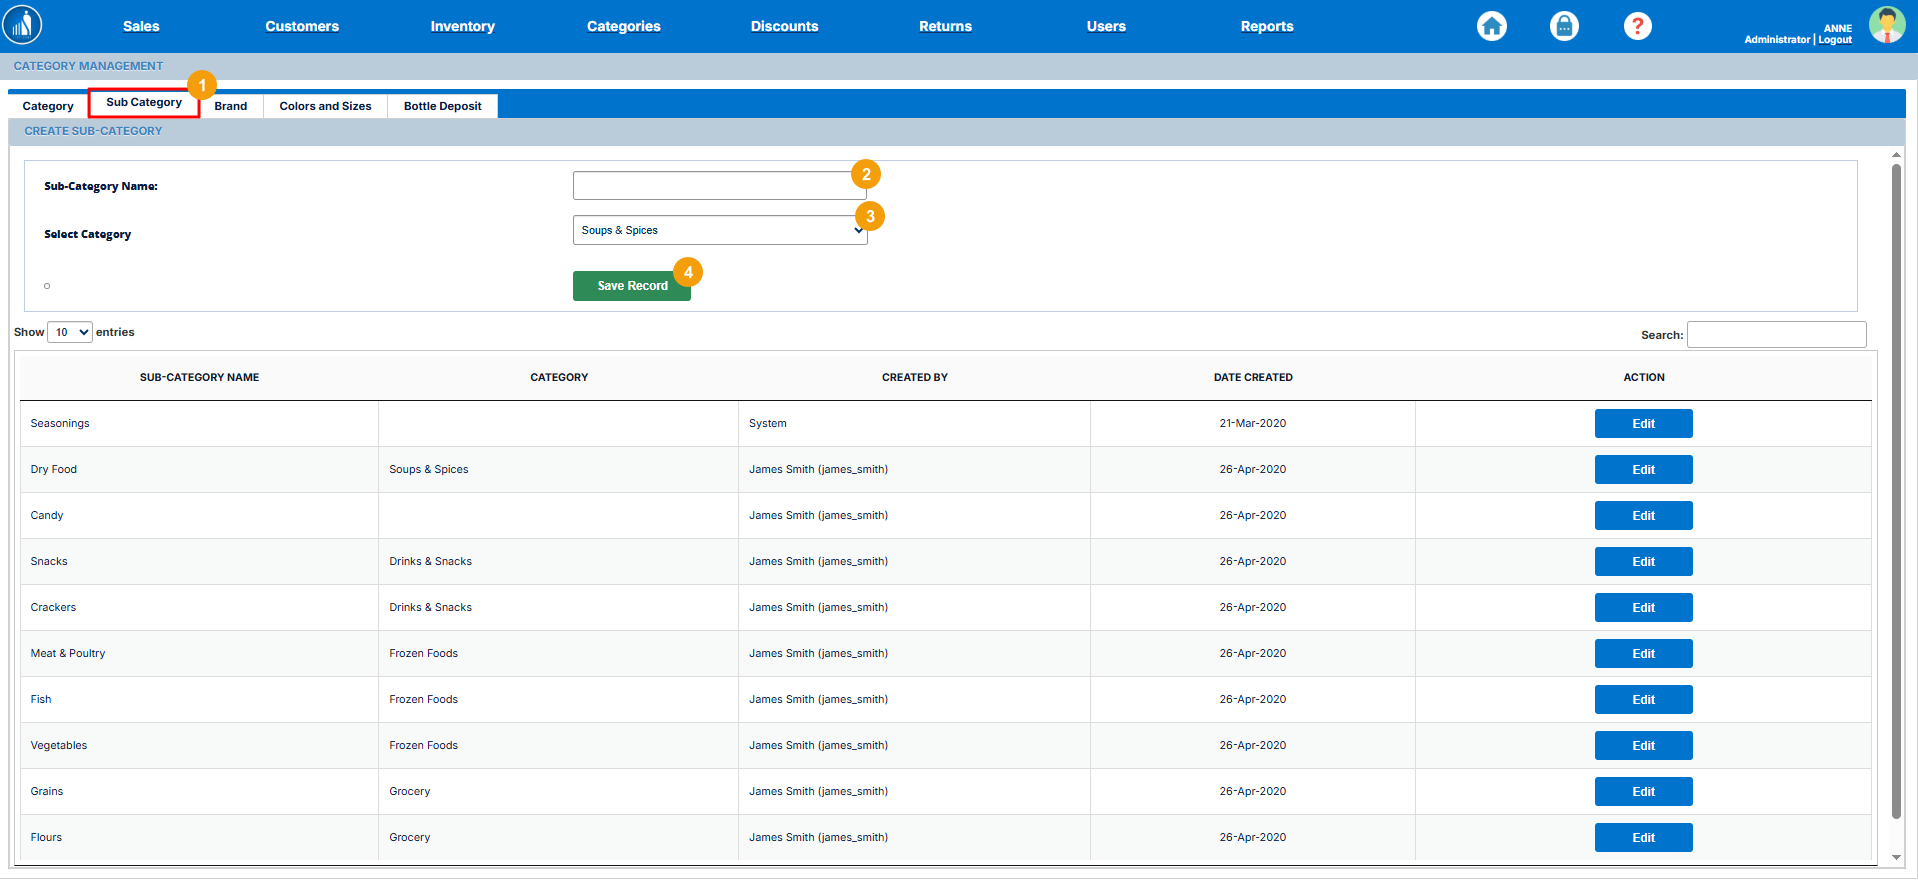
How to Add a Sub Category?Subcategory
1.Subcategories help you further organize products within a main category. They allow for more precise product classification, making it easier to manage and locate items in your inventory or POS.
To add a subcategory:
-
Go to the Sub-Category tab under Categories.
-
2.Sub-CategorySubcategorynameName. -
3.category.Category from the dropdown list. -
4.HitClick Save Record.to create the subcategory.
Tip: Use clear and descriptive subcategory names (e.g., Shoes → Men’s Shoes → Sneakers) to make searching and reporting more efficient.
How to Edit a Sub Category?
Subcategory
1.You can easily modify subcategory details such as the name or assigned category to keep your product organization accurate and up to date.
To edit a subcategory:
-
Go to the Sub-Category tab under Categories.
-
2.beforenext to thesub-categorysubcategory you want to change.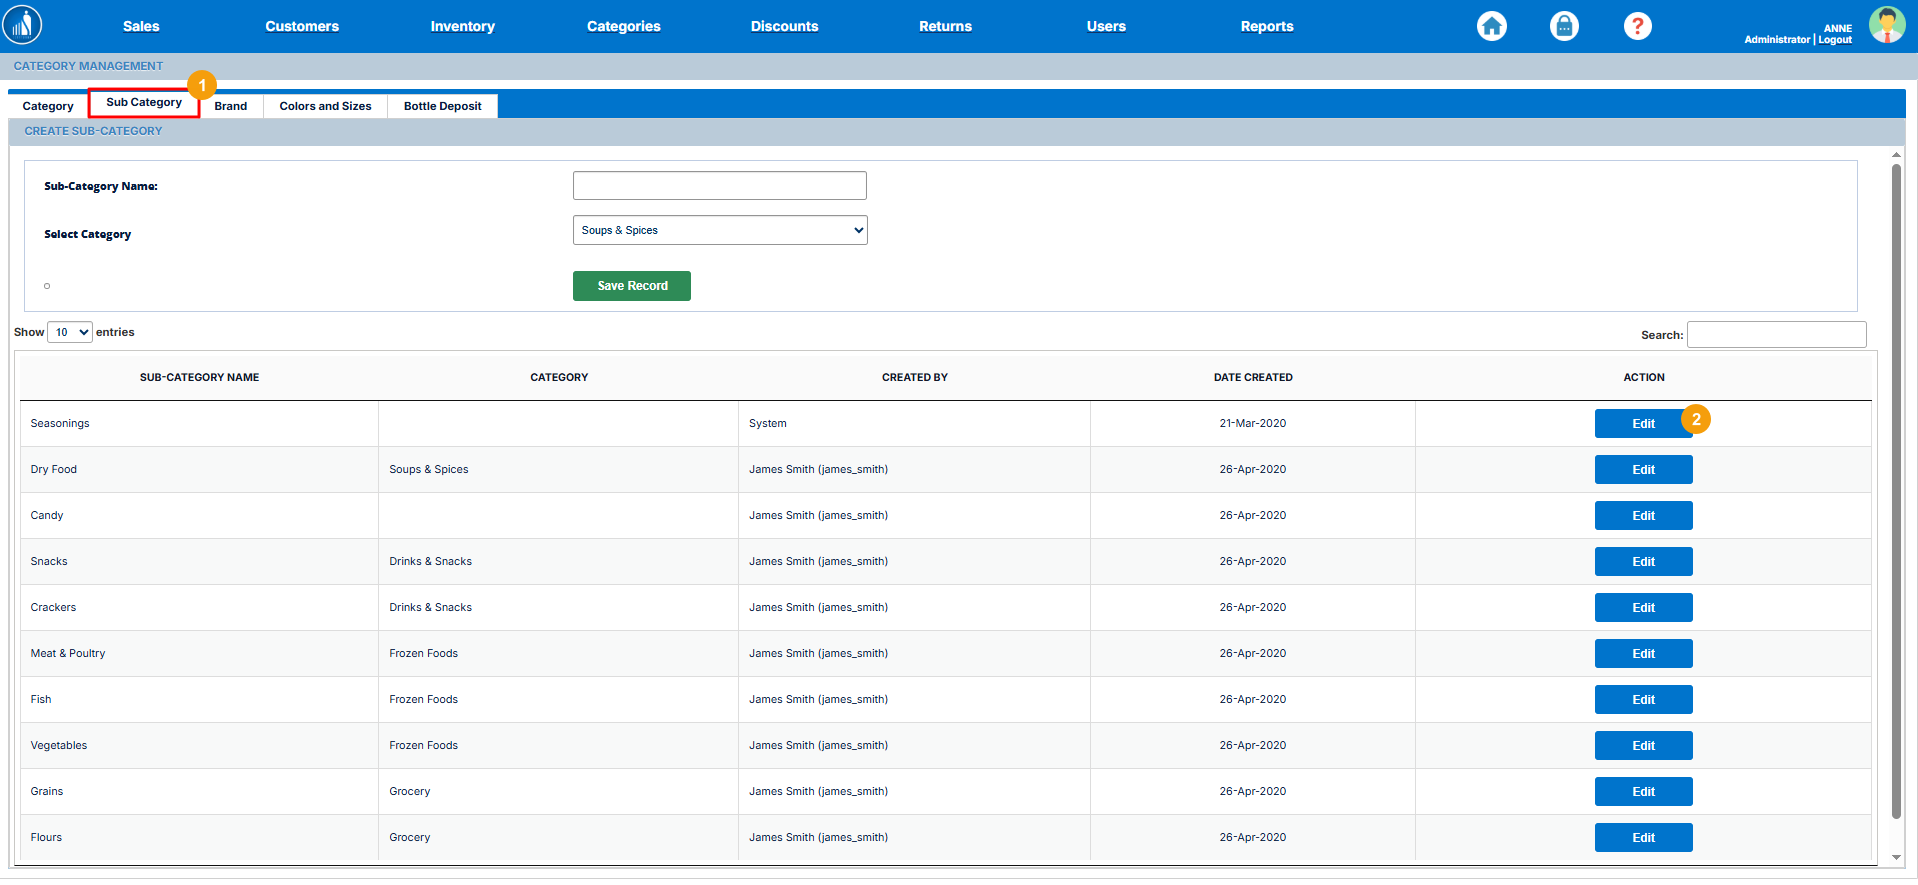
-
3.Make the desiredchanges.changes (e.g., rename the subcategory or reassign it to a different category). -
4.HitClick Save Record.to update the subcategory.
Tip: Regularly review your subcategories to ensure they align with current inventory structure — this keeps product searches, reports, and online store organization clear and consistent.


How to Create a New Brand?
Brand
If your store belongsoperates toin an industry withwhere brands,products likeare theorganized fashionby industry,brands (such as fashion, electronics, or beauty), you can add and manage those underbrands directly within the Brandssystem. tabThis ashelps follows:streamline product organization and reporting by brand.
1.To create a new brand:
-
Go to the Brands tab under Categories.
-
2.name.Name. -
3.SelectSelectthe associated Category. -
Add a
Brandcategory.4.ImageAddto help visually identify thebrand image.brand. -
5.HitClick Create Brand.to save it.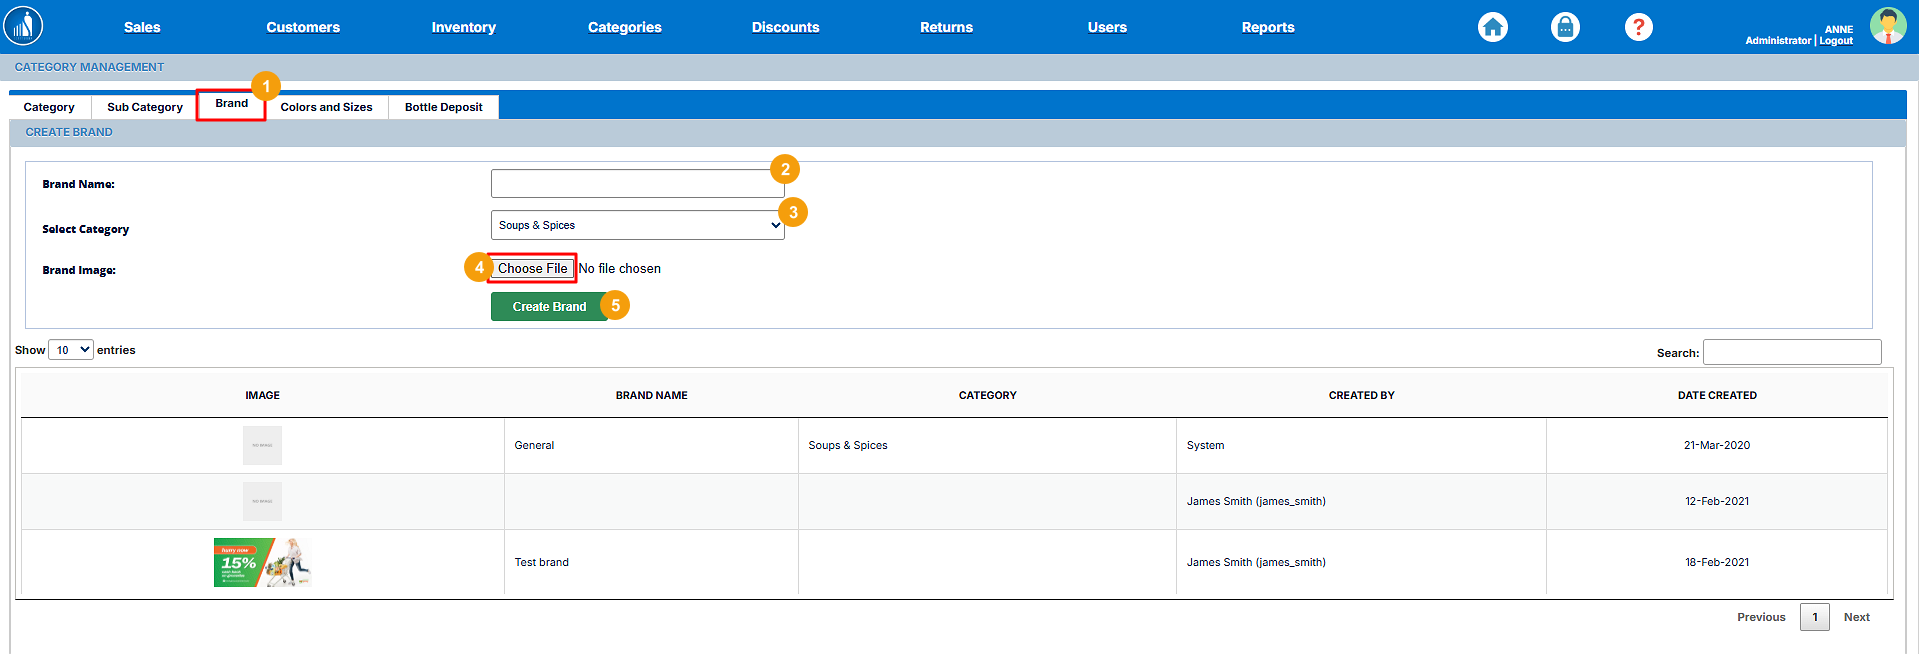
After adding the brands, you can assign them to product categories and uselink them when adding or editing products toin the inventory.
Tip: Consistently tagging products with their correct brand helps improve searchability, reporting accuracy, and customer browsing experience — especially in fashion and electronics retail.
Tip: Consistently tagging products with their correct brand helps improve searchability, reporting accuracy, and customer browsing experience — especially in fashion and electronics retail.

How to Add Colors and Sizes?Sizes
If your products comeare available in differentmultiple colors andor sizes,sizes, Scantranx allows you canto specifydefine themthese attributes under the Categories asmodule. follows:This helps you create and manage product variations more effectively, ensuring accurate inventory tracking for each variant.
1.To add colors and sizes:
-
Go to the Colors and Sizes
tab.tab under Categories. -
2.(— either Color orSize)Size. -
3.value.Value (e.g., Red, Blue, Small, Medium, Large). -
4.onSave Record.to store the attribute.
Tip: Adding standardized color and size options makes it easier to create variable products, ensuring consistency across your product listings and improving search accuracy in your POS and online store.
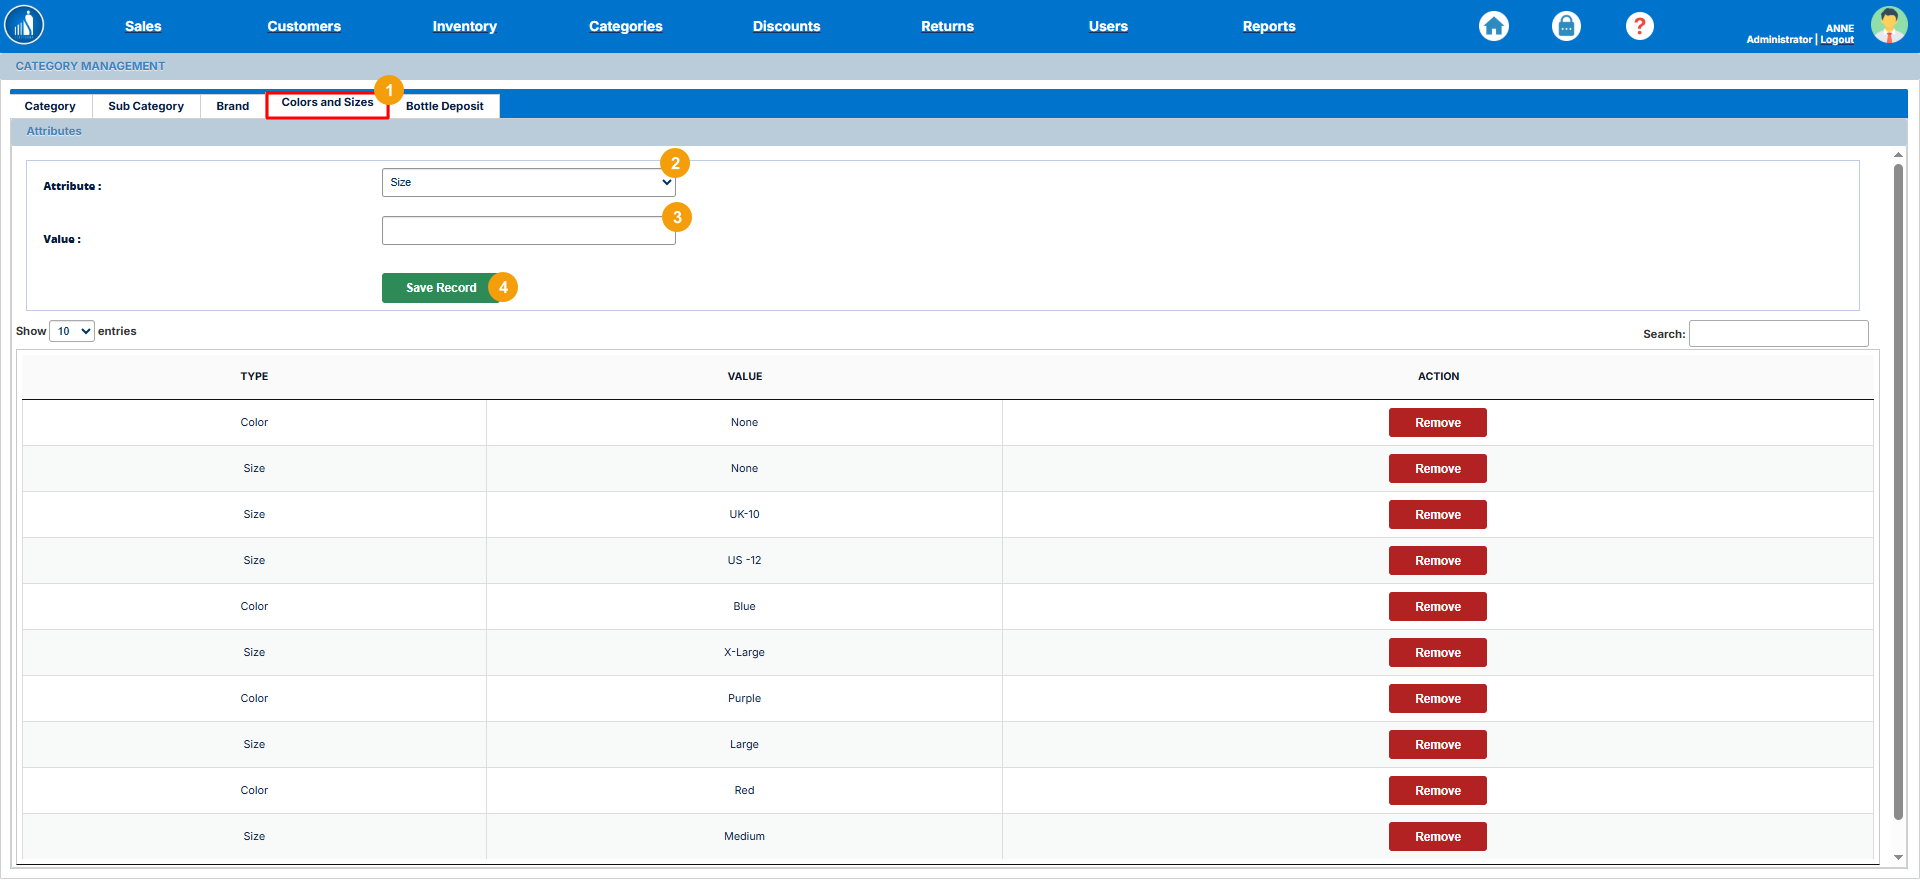
Note: You can also remove the colors and sizes by clicking the Remove button.
How to Specify Bottle Deposit Amount?
Amount
The Bottle Deposit feature allows you to add a refundable deposit fee to bottled products. This amount is charged to the customer at the time of purchase and refunded when the bottle is returned for recycling. It helps support sustainability programs and compliance with regional recycling regulations.
To specify a bottle deposit is the refundable amount that the consumer pays while purchasing a bottled product. The amount is returned back to them when they return the bottle for recycling.amount:
-
1.tab.tab under Categories. -
2.Name.(e.g., Glass Bottle, Plastic Bottle). -
3.amount.Amount to be charged as a deposit. -
4.
Tip: Assign bottle deposits only to applicable products (e.g., beverages or liquid containers). This ensures accurate billing and easy refund processing at the POS.
