Managing Sales
The Sales tab allows you to manage all your sales transactions in one place. From here, you can search, view, filter, and export sales data — giving you full visibility into your store’s performance.
This section explains how to navigate and use the Sales tab effectively.
Overview
Under the Sales tab, you can:
-
View all completed, pending, or refunded sales.
-
Search for specific orders by order number or date.
-
Export sales data for reporting or accounting purposes.
-
Open individual sales records to view transaction details, payment methods, and items sold.
The Sales tab provides quick insight into your daily business activity and is essential for reviewing performance or resolving customer inquiries.
How to Search for Orders
You can locate a specific sale using one of two search methods:
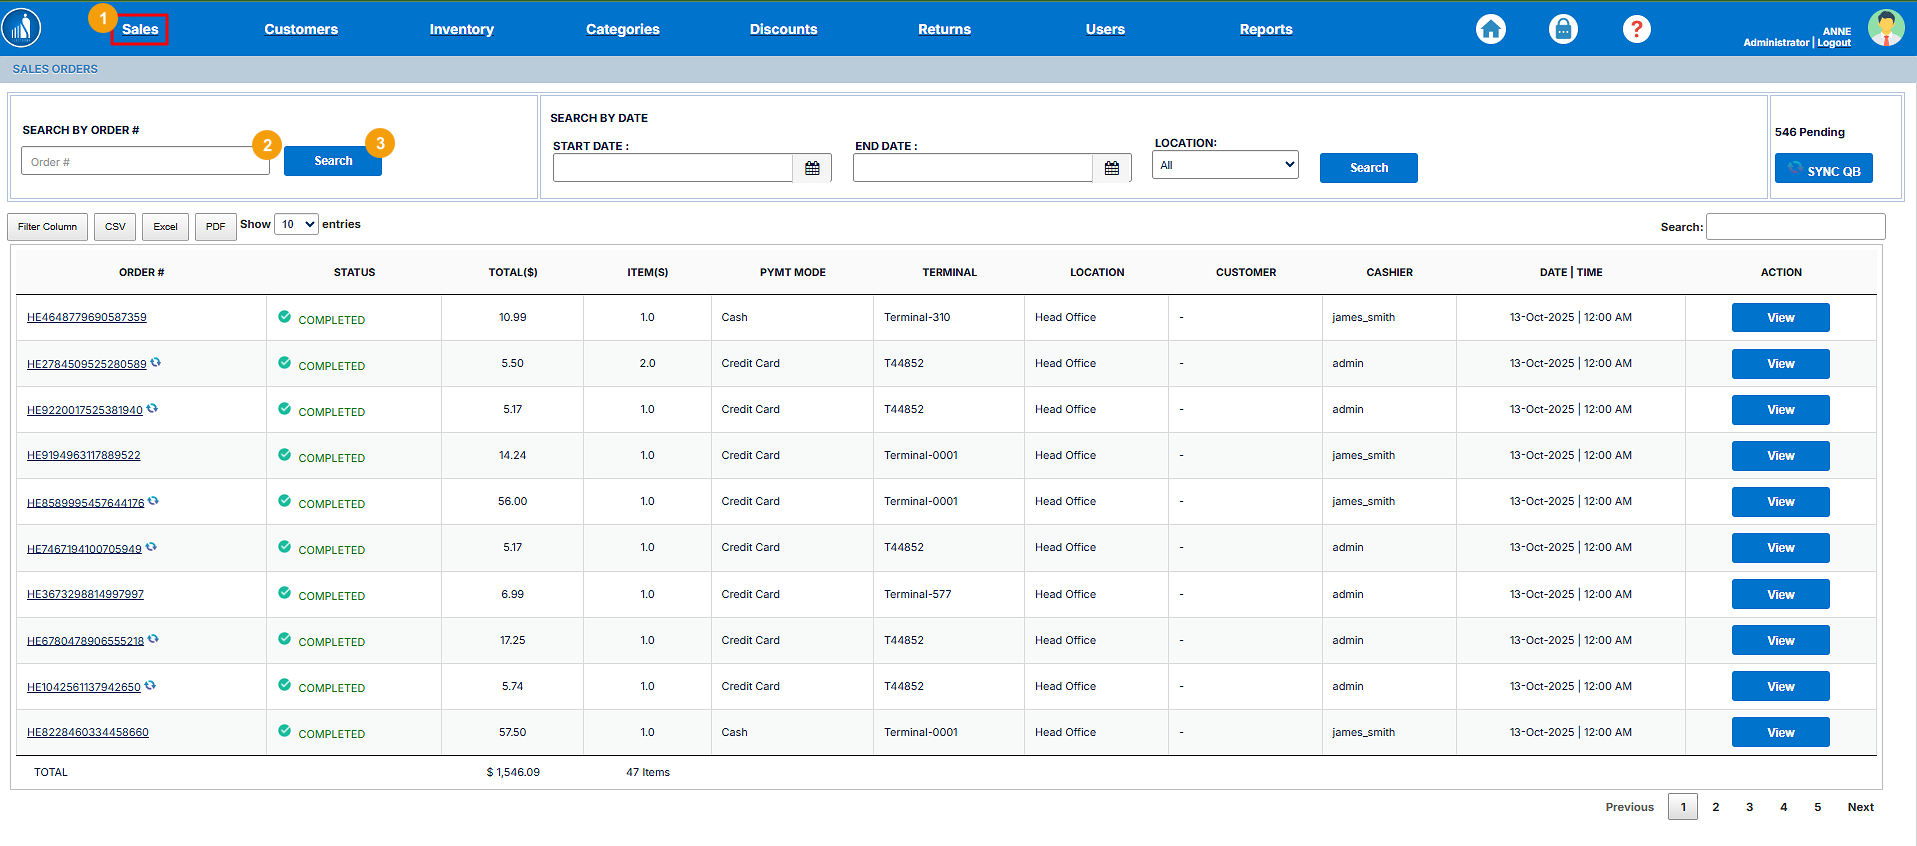
i. Search by Order Number
-
Go to the Sales tab from the top navigation bar.
-
In the search bar, enter the Order Number.
-
Click Search.
-
The matching order will appear in the results list.
-
Click the order record to view full transaction details.
Tip: This is the fastest way to locate a known transaction when the order number is available.
ii. Search by Date
Note: You can combine filters (e.g., date + location) to narrow your search results.

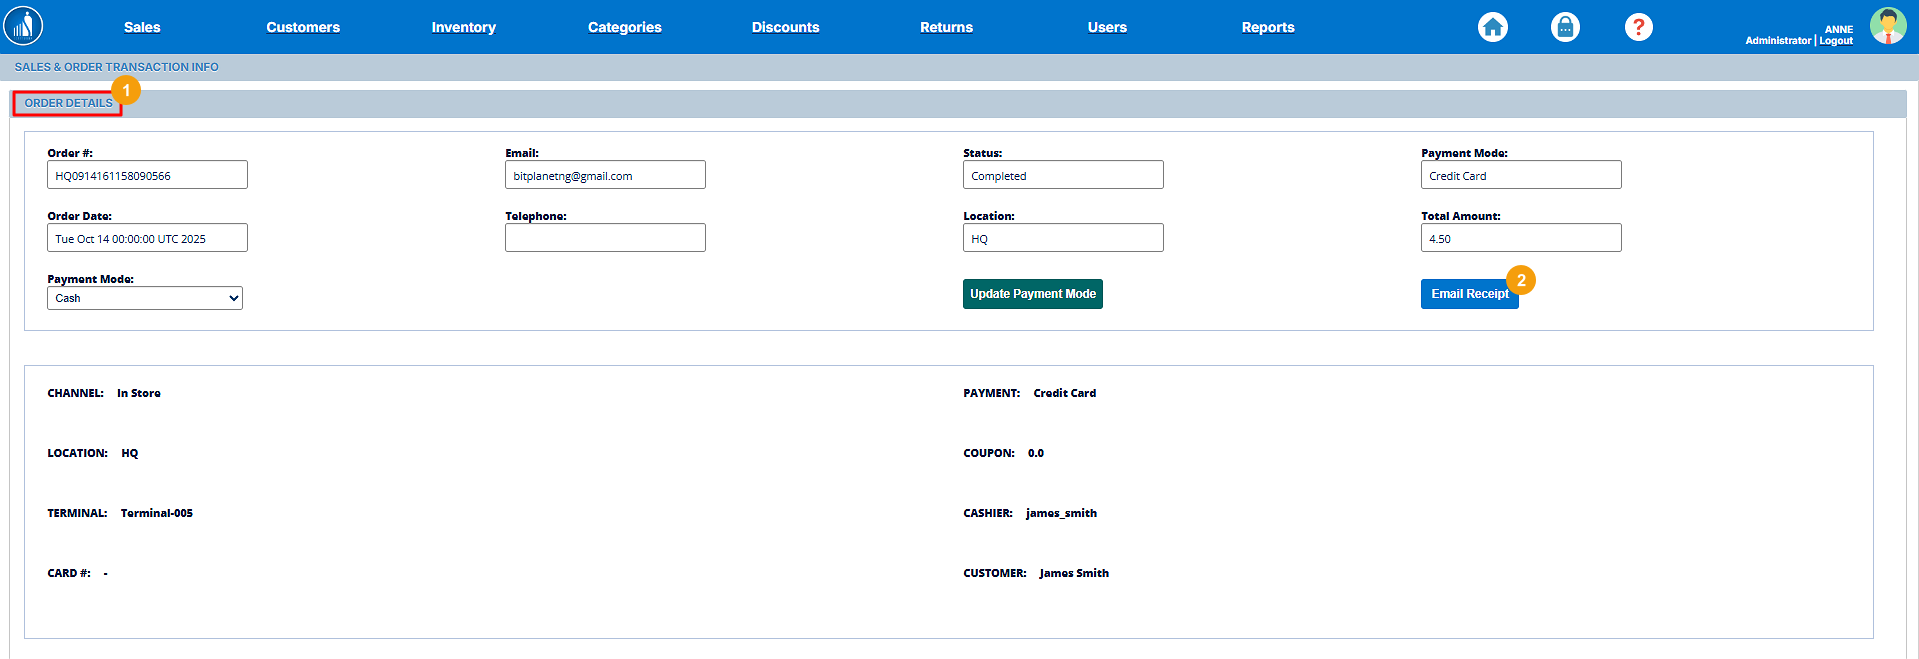
View Order Details
You can easily view detailed information for any sales order, including products sold, payment method, total amount, and transaction status.
If you’ve searched for a specific order or clicked on its order number, the system will take you directly to the Order Details page.
Alternatively, you can follow these steps:
-
Go to the Sales tab from the main navigation menu.
-
Locate the order you wish to review.
-
Click on the View button next to the order.
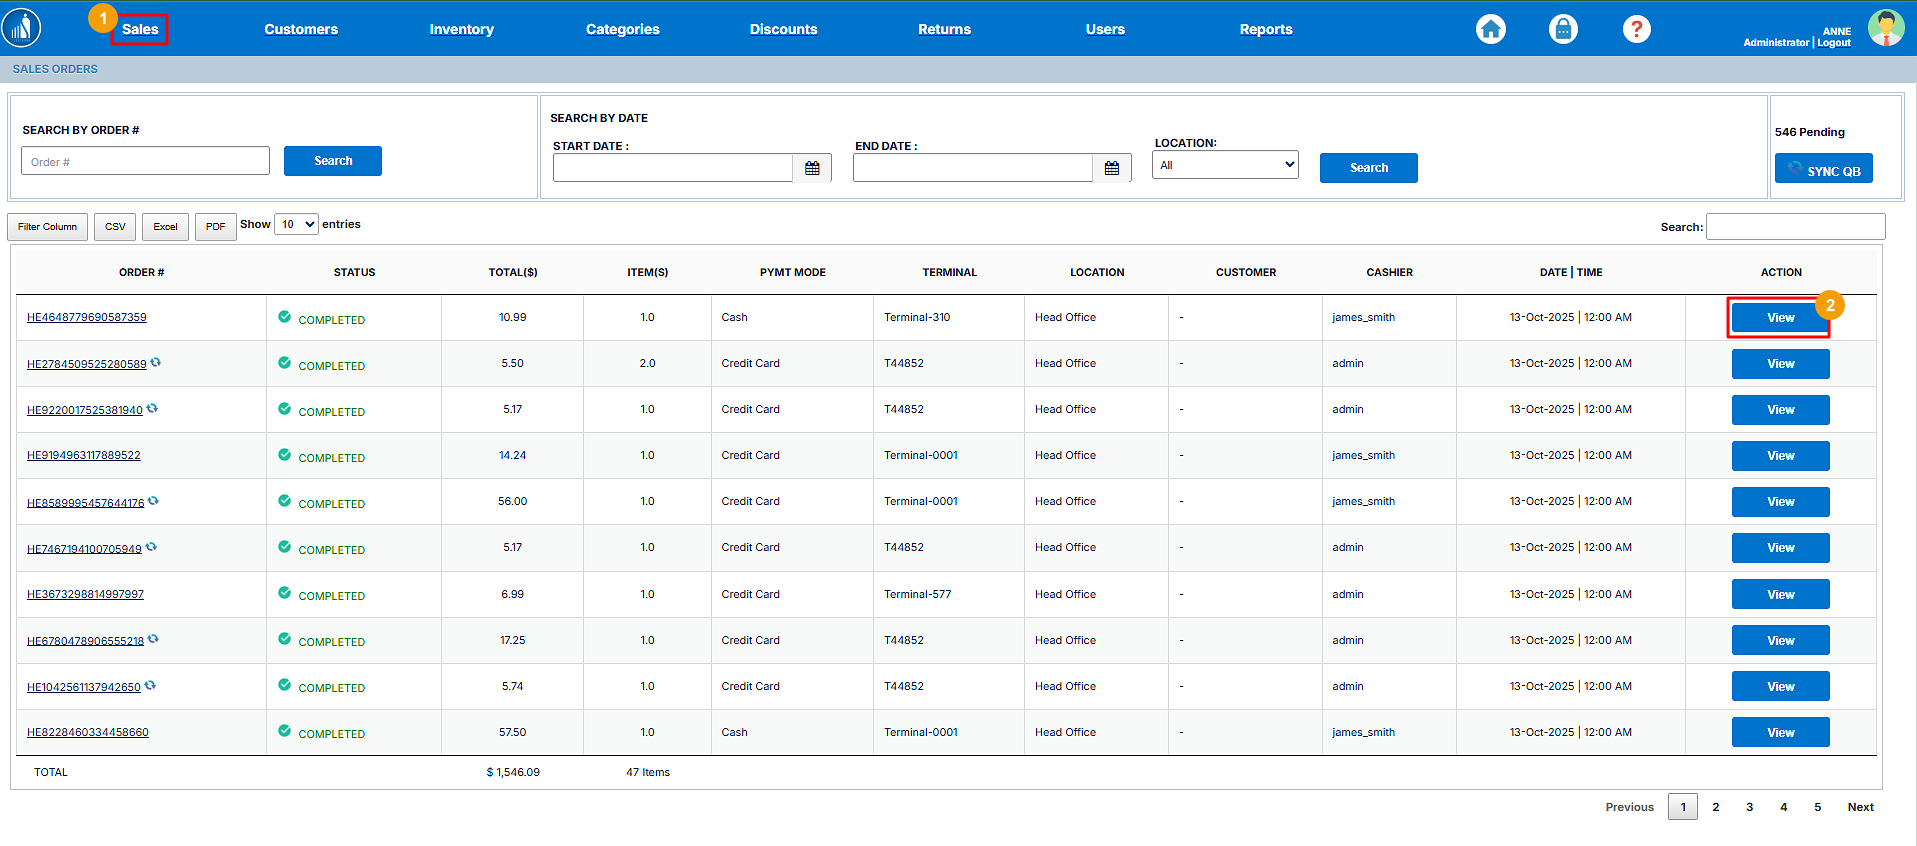
3. Once the Order page opens up, click on the Order Detail link.
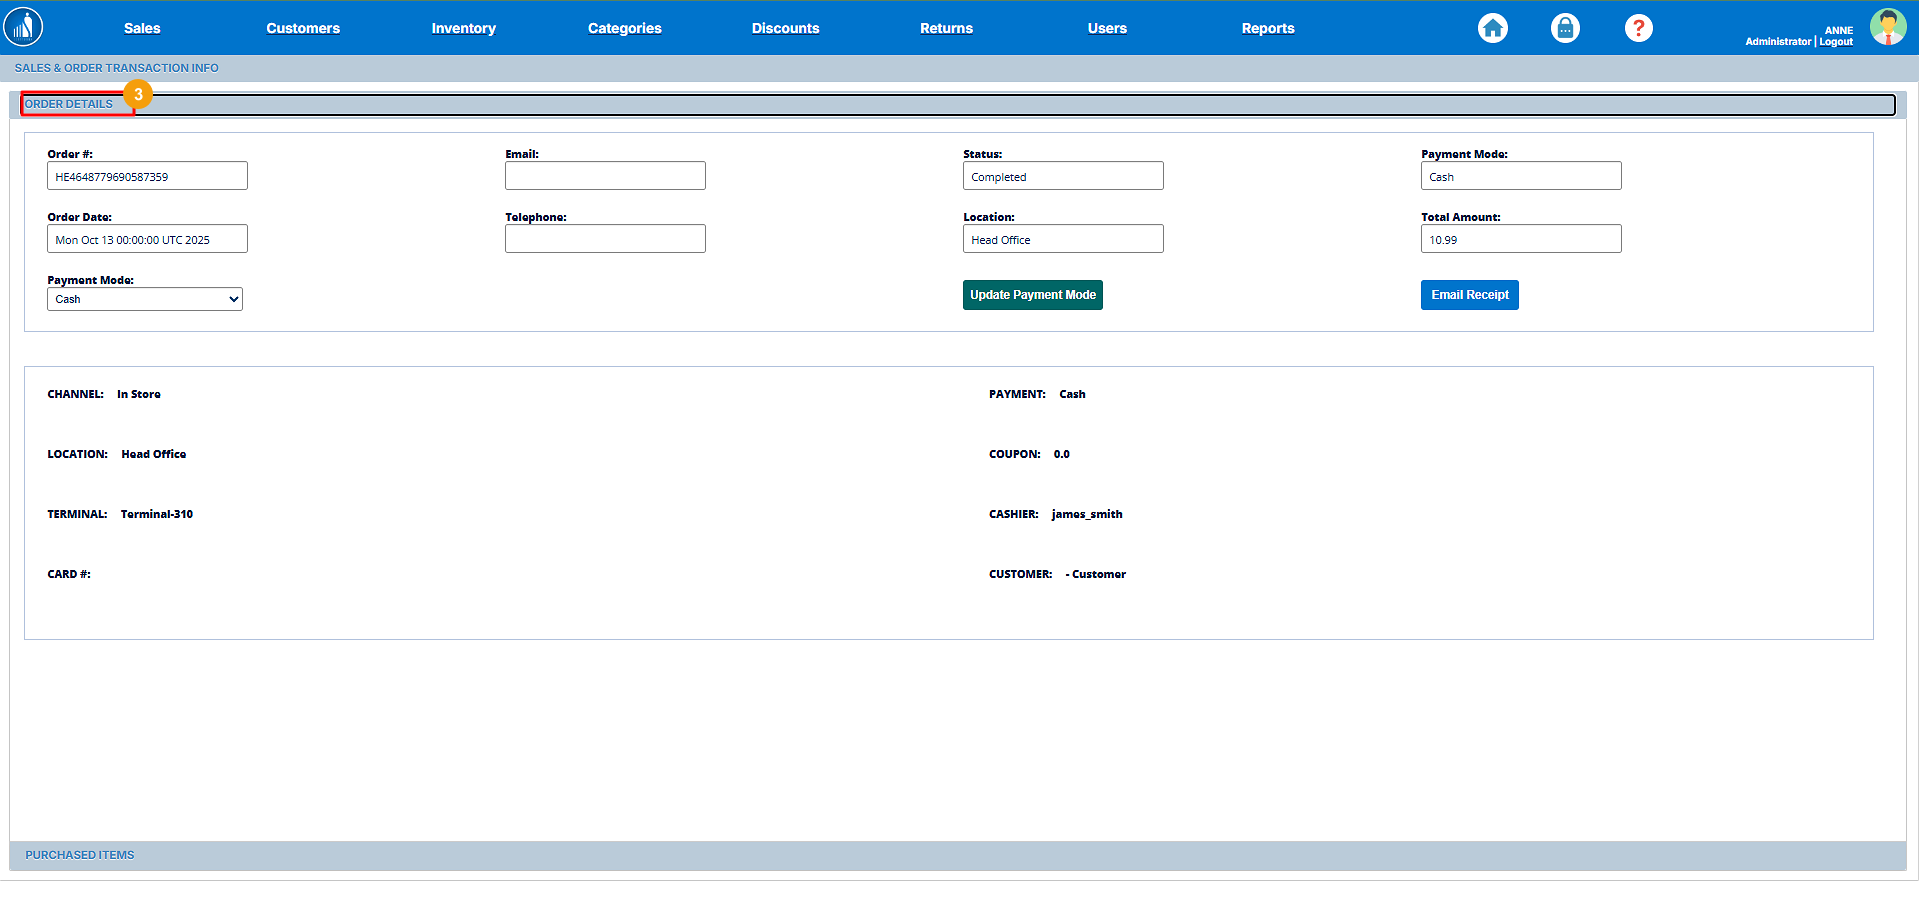
The Order Details screen will display the following information:
-
Order Number and Date
-
Customer Name and Contact Information
-
Payment Method (Cash, Card, Wallet, etc.)
-
List of Products Sold (including quantity, price, and total)
-
Subtotal, Tax, Discounts, and Total Amount
-
Order Status (Completed, Pending, Refunded, etc.)
-
Sales Representative/User who processed the transaction
Tip: From this page, you can also print the receipt or download the sales invoice for recordkeeping.
All the order details will appear on the screen. From here, you can update the payment mode for the order and send the receipt to the recipient. For online orders, you can also manage the shipping details from here.
Updating Payment Mode
If the cashier or customer selects an incorrect payment method during checkout or while generating a receipt, Scantranx allows you to correct it directly from the Order Details page.
Follow these steps to update the payment mode:
-
Go to the Order Details page as described in the previous section.
-
From the Payment Mode dropdown, select the correct payment option (e.g., Cash, Credit Card, Bank Transfer, Wallet, etc.).
-
Click the Update Payment Mode button to save the changes.
Note: Updating the payment mode will automatically reflect in reports and accounting summaries to ensure accurate financial records.
Tip: Only users with the necessary permissions (e.g., Manager or Administrator role) can modify payment details for completed transactions.
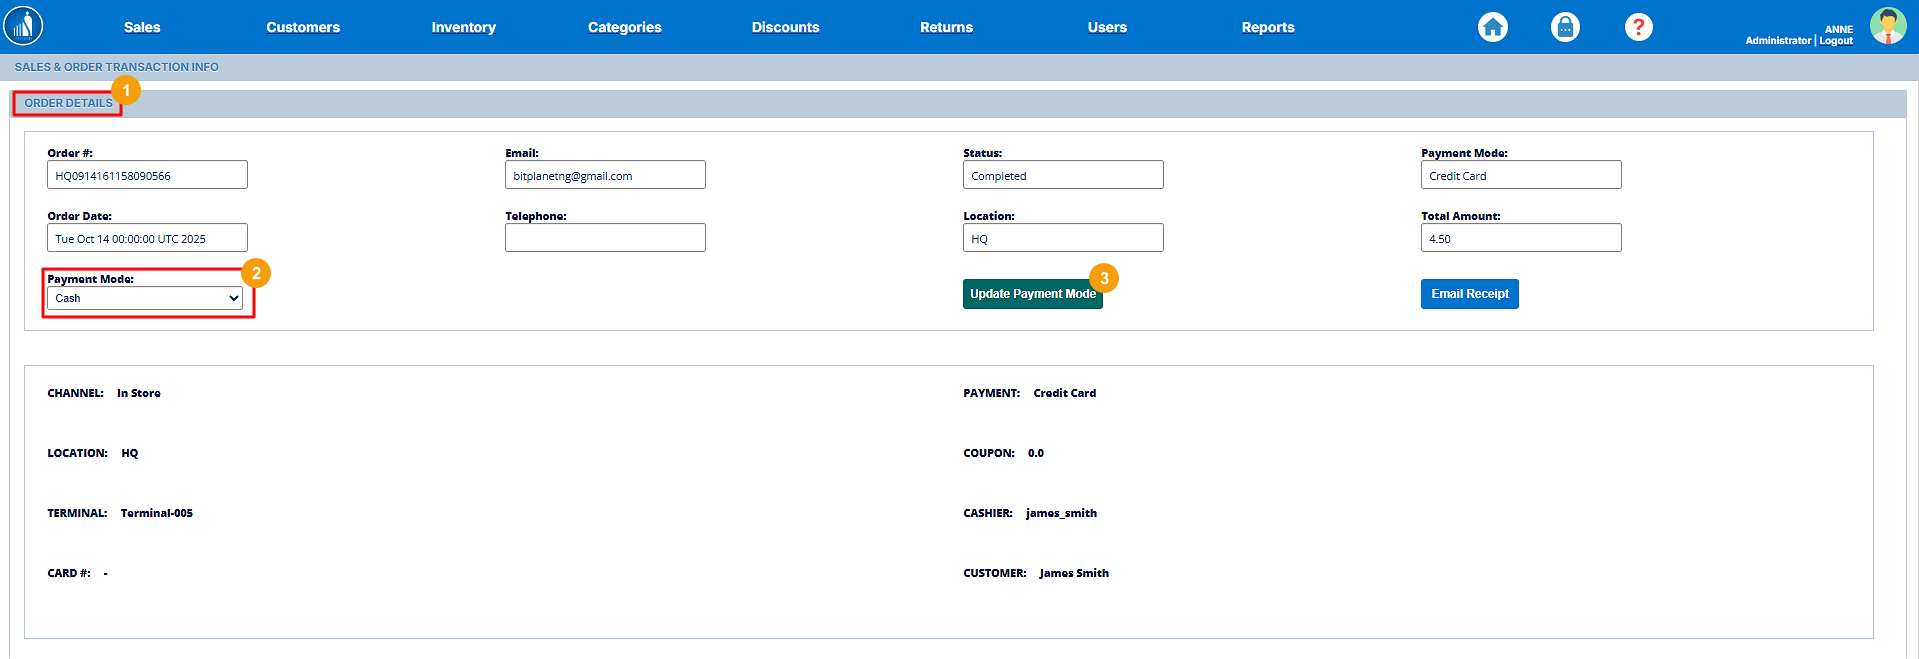
Email Receipt to the Recipient
Scantranx allows you to send a digital copy of the sales receipt directly to the customer via email. This feature ensures customers have an electronic record of their purchase for reference or returns.
To email a receipt:
-
Go to the Order Details page as described in the previous section.
-
Click the Email Receipt button.
-
The receipt will be automatically sent to the customer’s registered email address.
Note: Ensure that the customer’s email address is correctly entered in their profile before sending the receipt.
Tip: This feature helps reduce paper usage and provides customers with quick, convenient access to their purchase details.
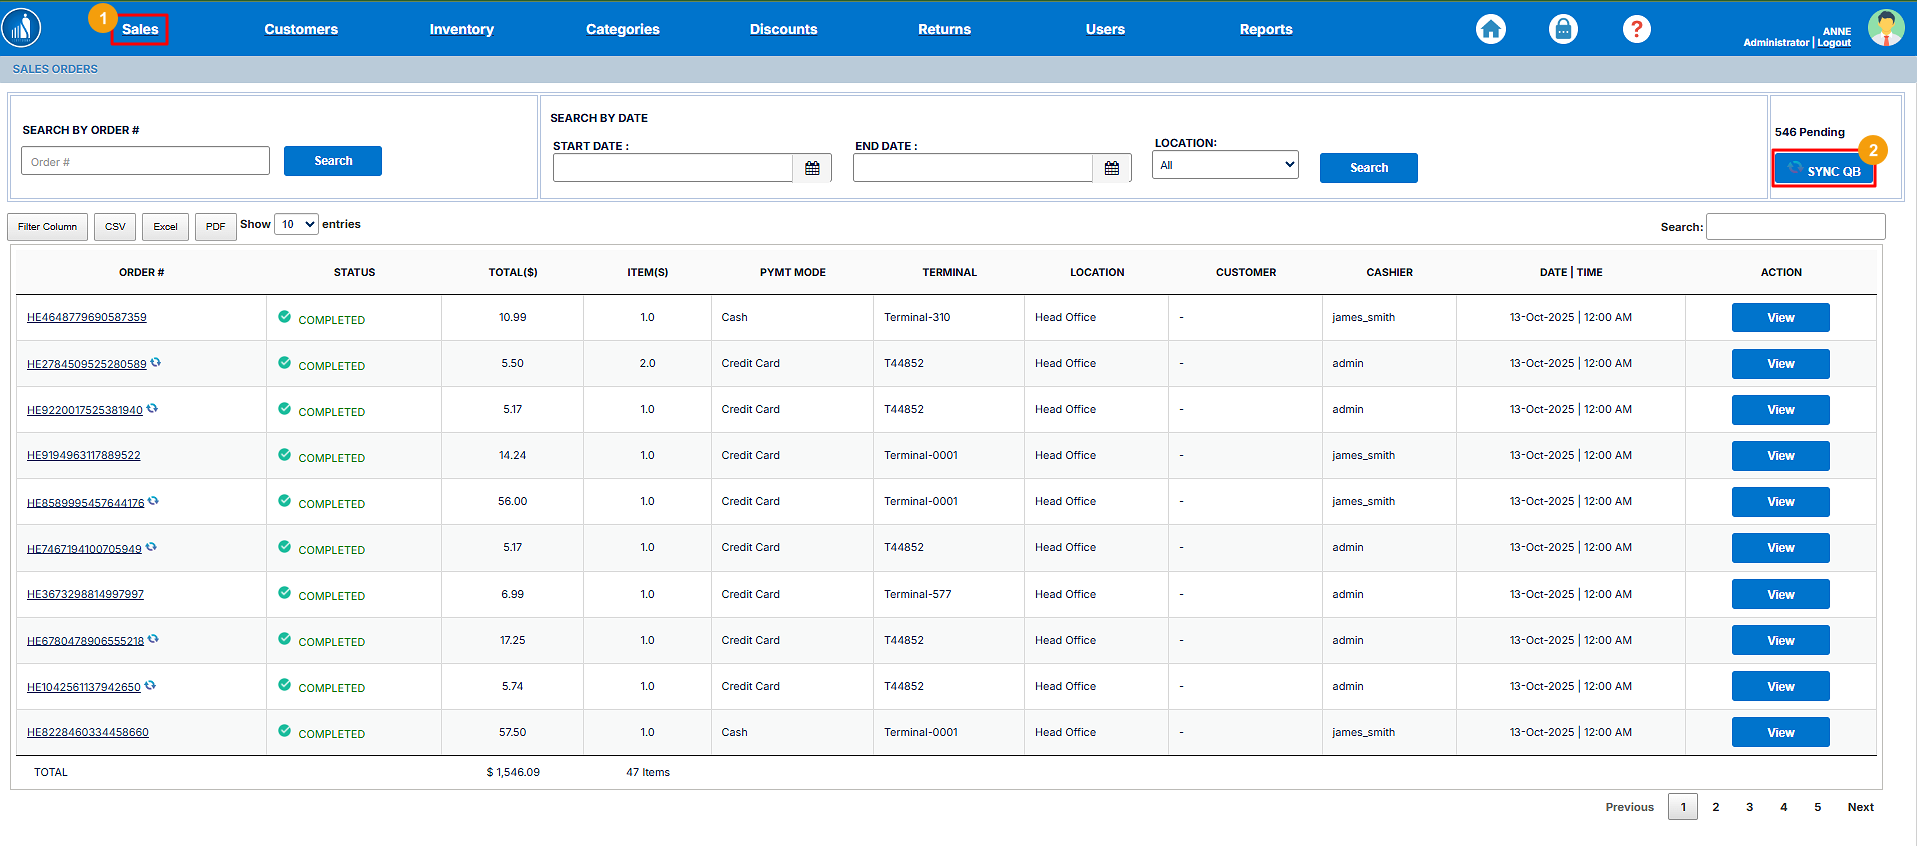
Syncing to QuickBooks
The software is connected to QuickBooks, hence it automatically pushes the transactions to it (if configured properly). But if, for some reason, it fails to do so, you can manually push the transactions to QuickBooks as follows:
1. Go to the Sales tab.
2. If there are pending transactions, click on the Sync QB button.
The pending transactions will start syncing to QuickBooks.
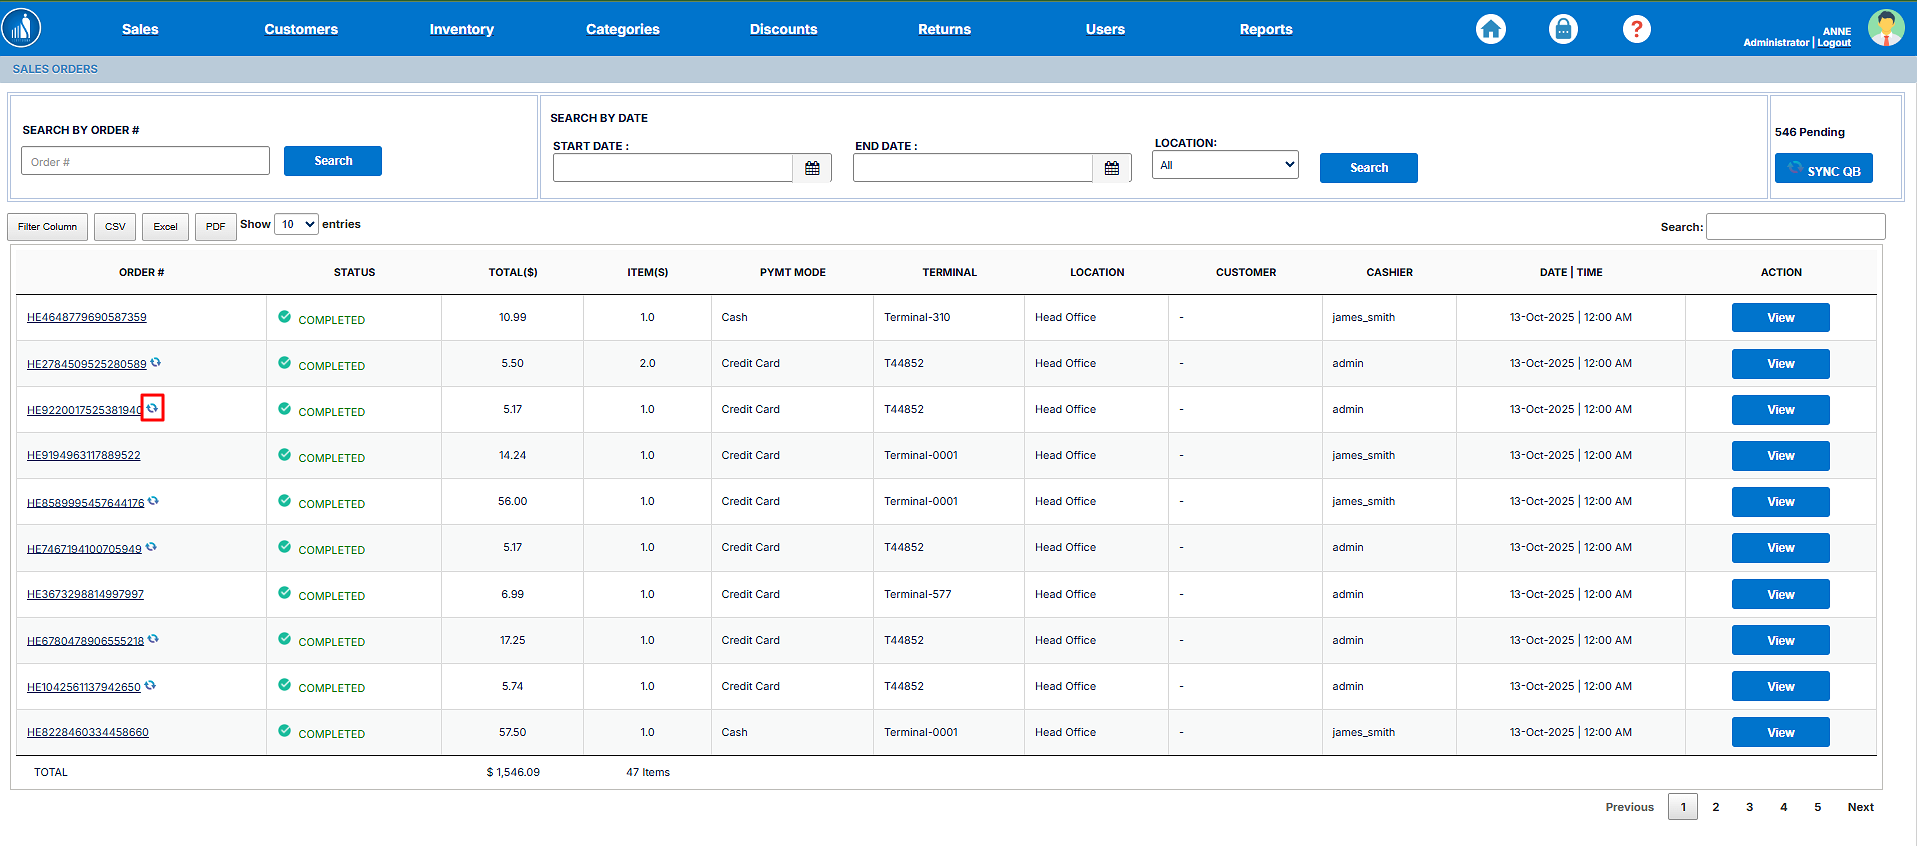
Please note that if the software is working fine and QB is appropriately configured, you’ll see zero pending transactions. Also, the icon annotated in the following image shows that the transaction has been synced to QuickBooks:
Exporting Sales Data
Scantranx allows you to export your sales data as a CSV, Excel or a PDF file. You can do so as follows:
1. Go to the Sales tab.
2. Click on the CSV, Excel or PDF button as per your preference.
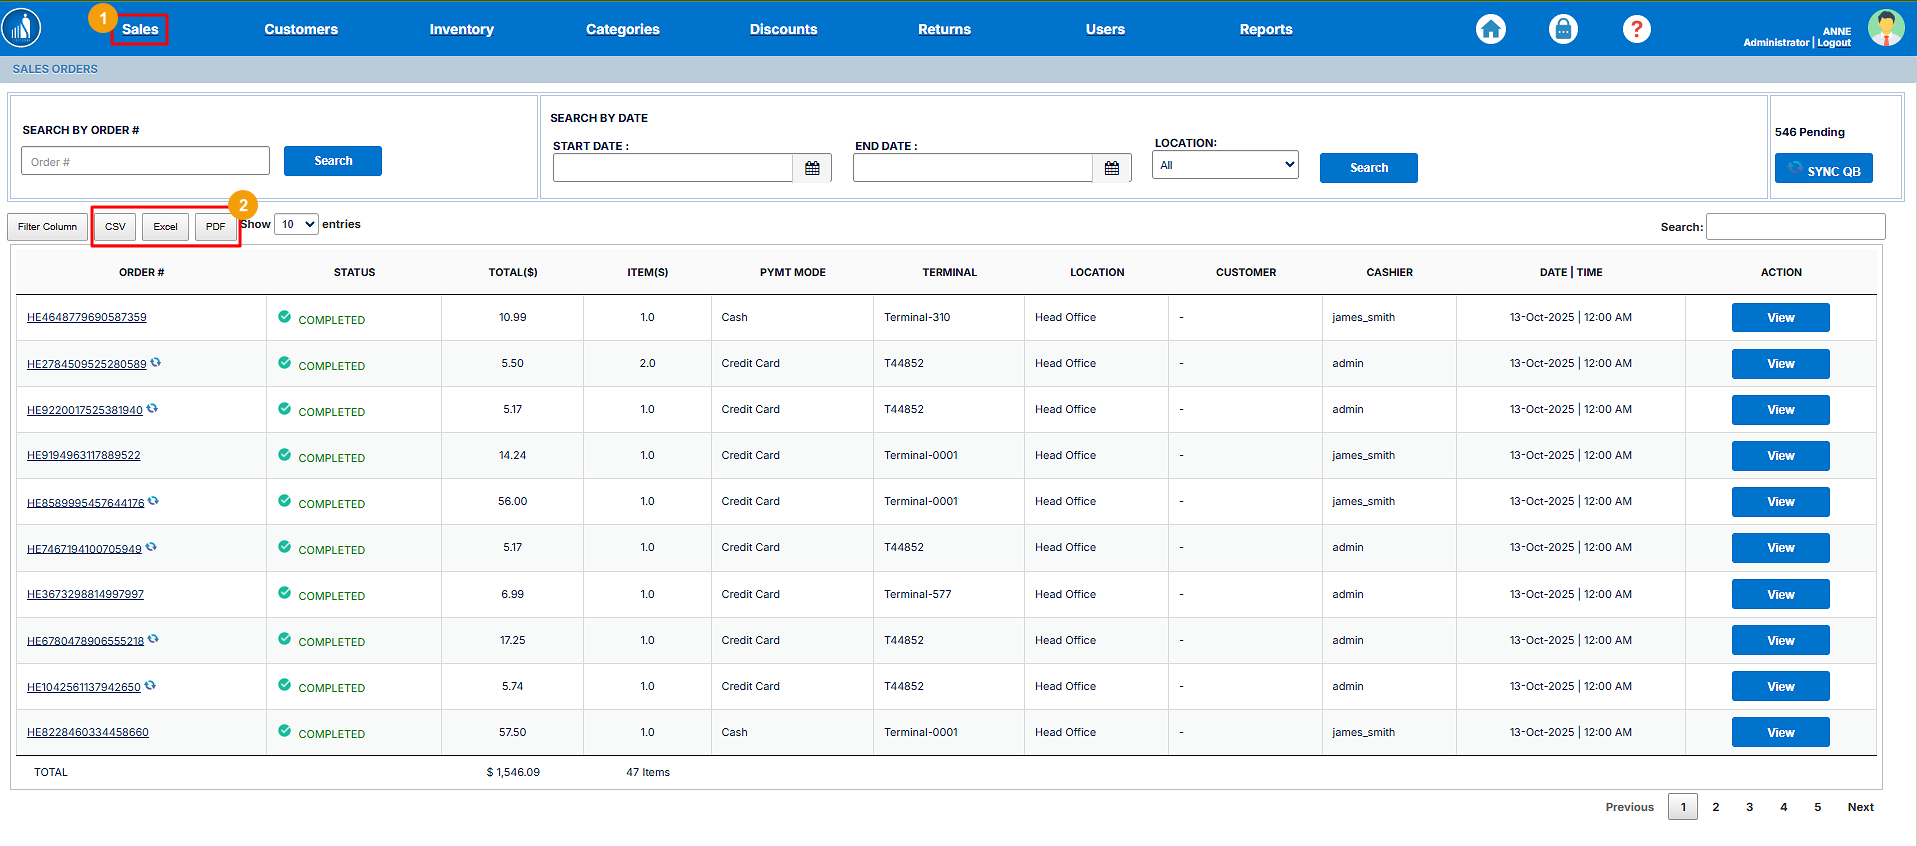
The file will be transferred to your local machine.