Managing Sales
The Sales tab allows you to manage your sales data. You can search for the sale, export sales data, view specific orders and much more.
How to Search for Orders?
You can search for a sale order in either of two ways:
i. Search by Order Number
ii. Search by Date
Search by Order Number
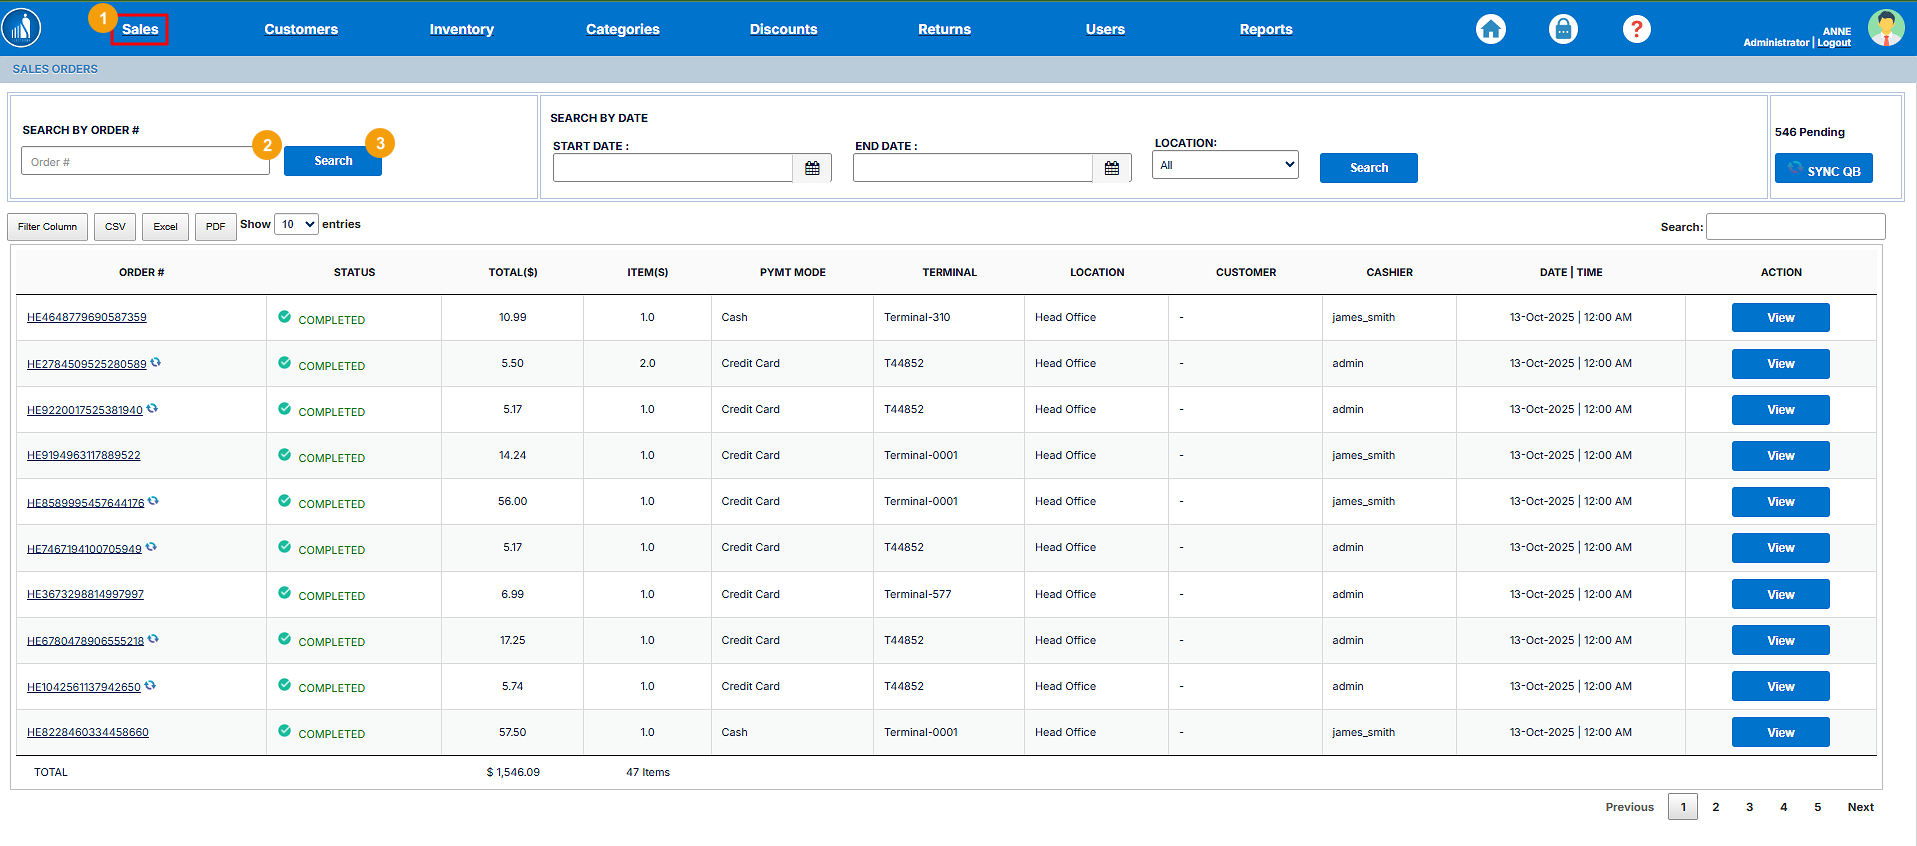
1. Go to the Sales tab.
2. Enter the Order Number.
3. Click Search.
Search By Date
1. Go to the Sales tab.
2. Enter Start Date.
3. Enter End Date.
4. Select a Location.
5. Click Search.

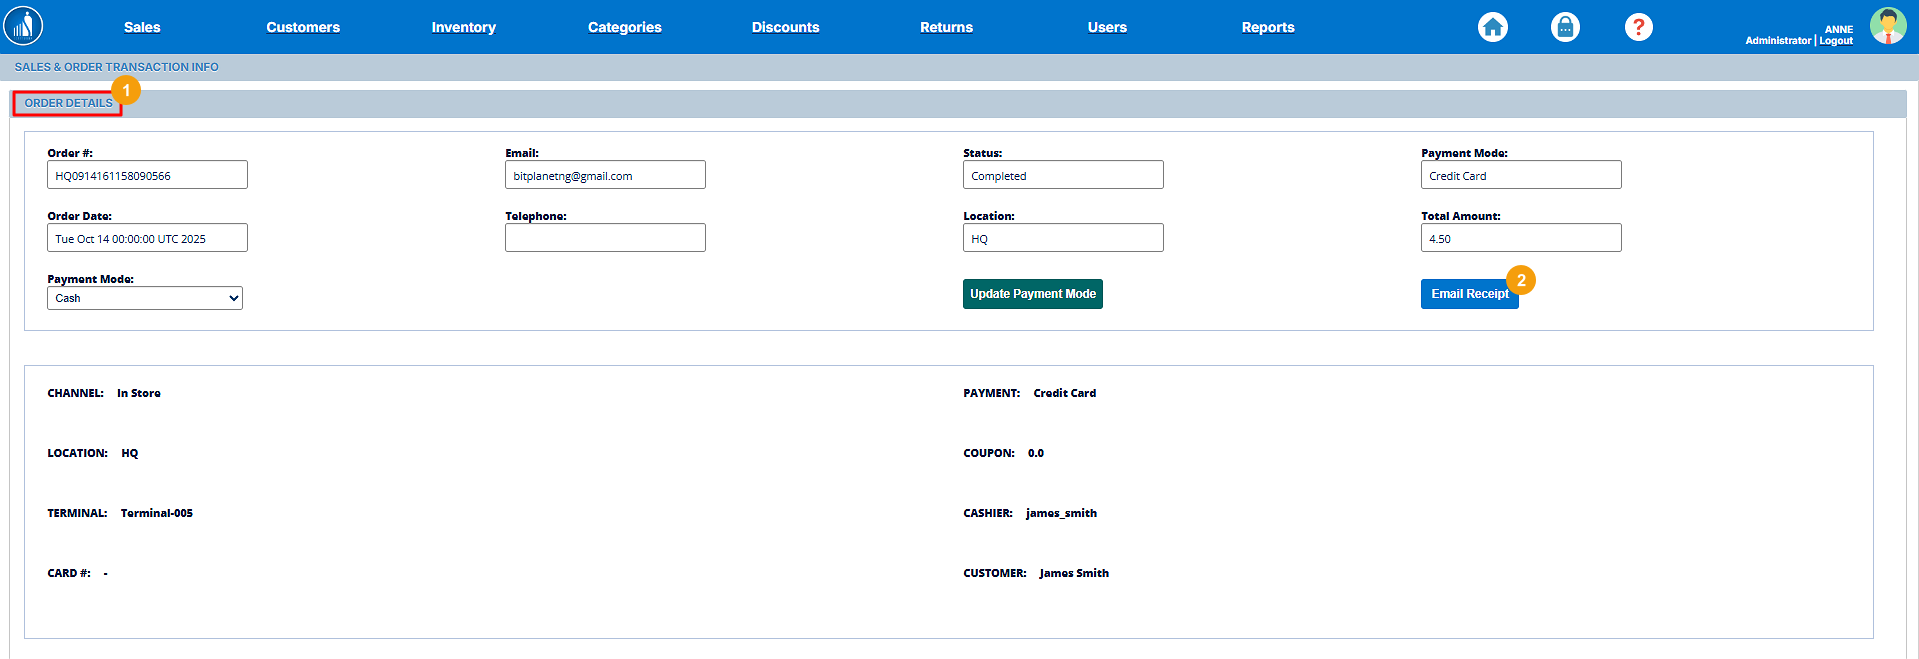
View Order Details
If you search for an order or click on the order number, you can access the order details. Alternatively:
1. Go to the Sales tab.
2. Click on the View button for the order whose details you want to see.
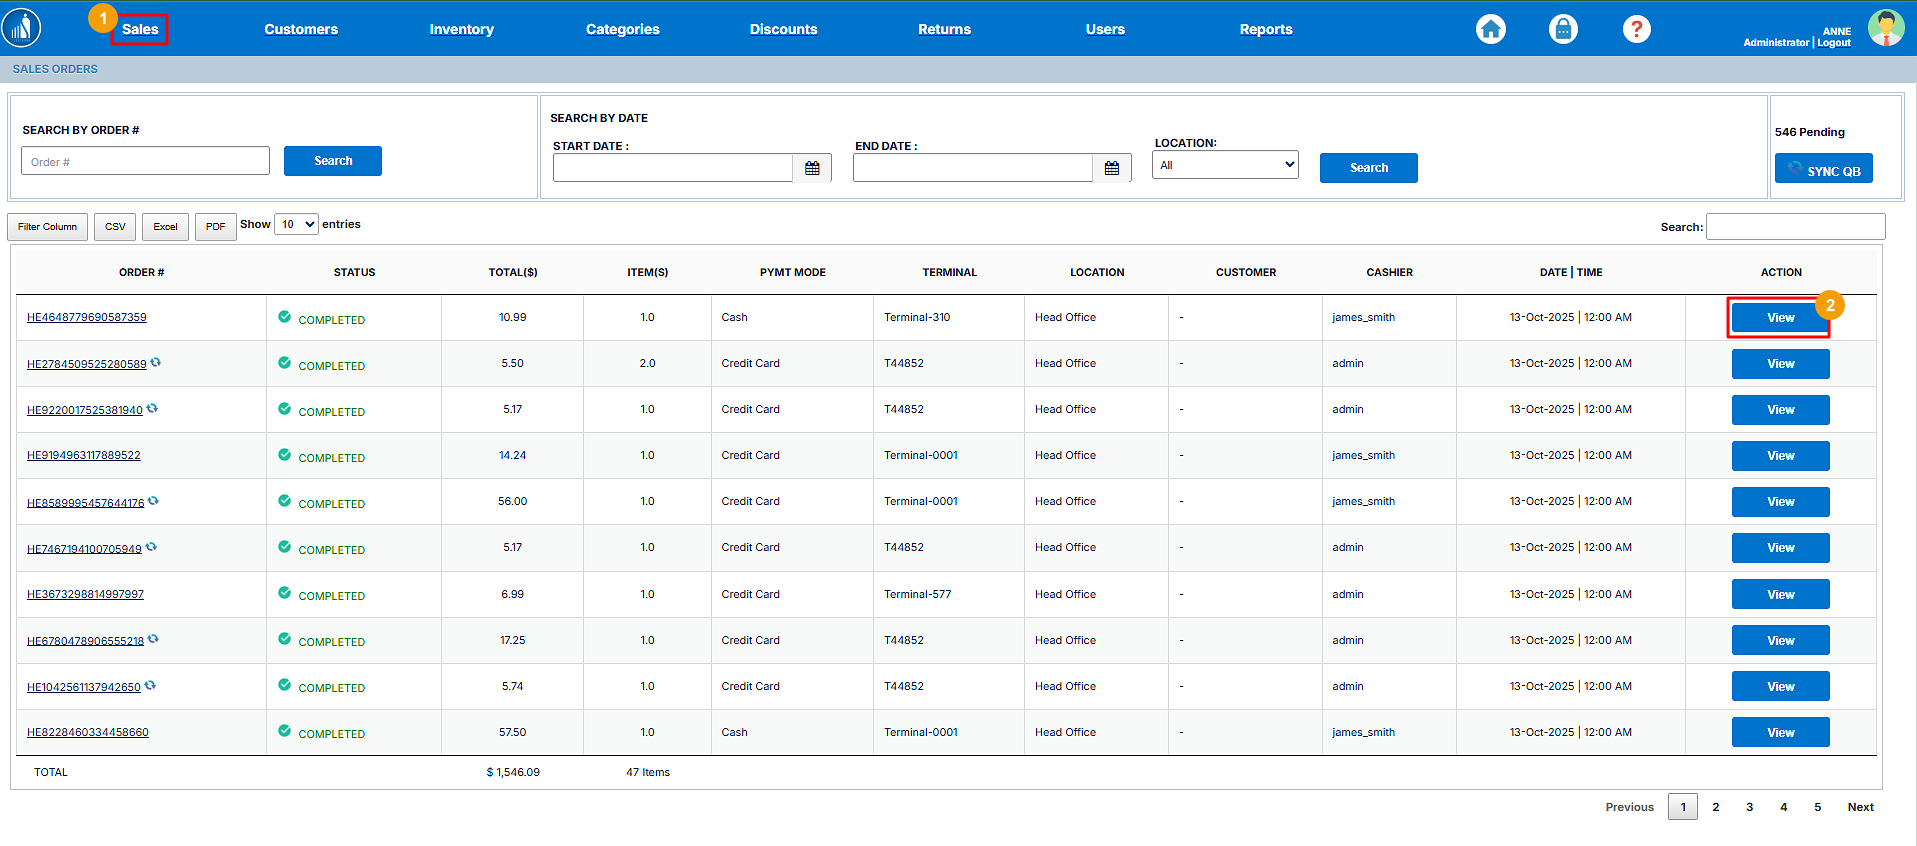
3. Once the Order page opens up, click on the Order Detail link.
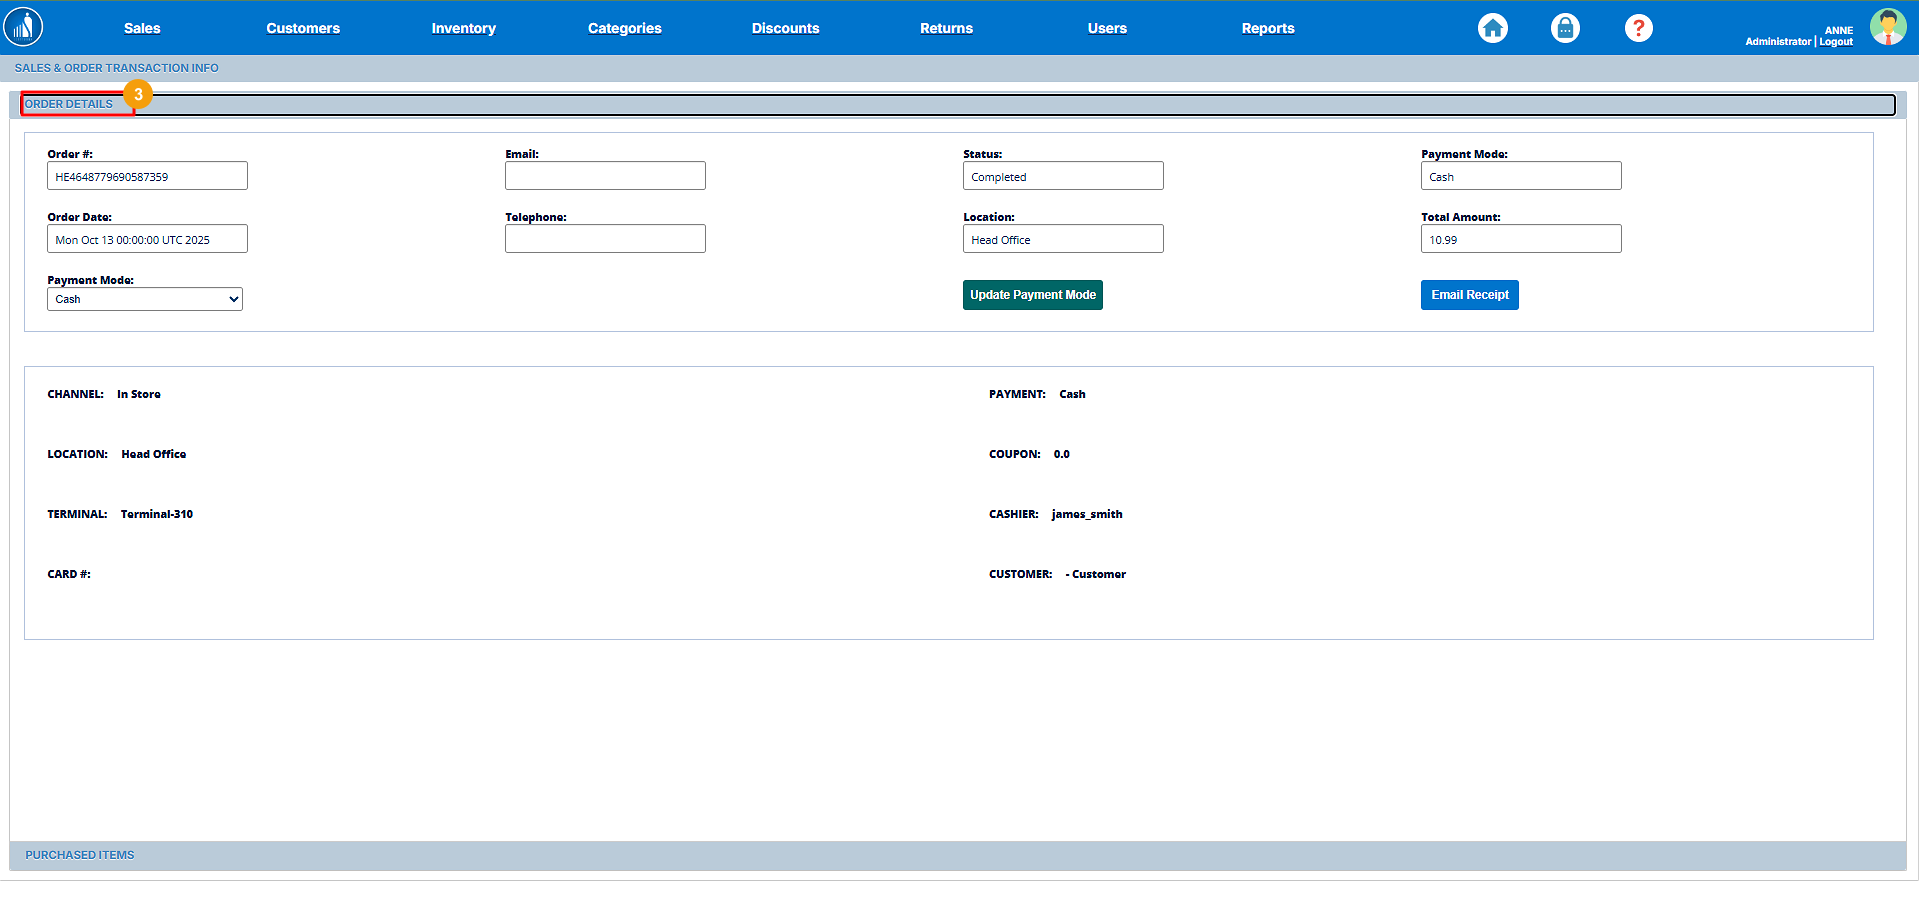
All the order details will appear on the screen. From here, you can update the payment mode for the order and send the receipt to the recipient. For online orders, you can also manage the shipping details from here.
Updating Payment Mode
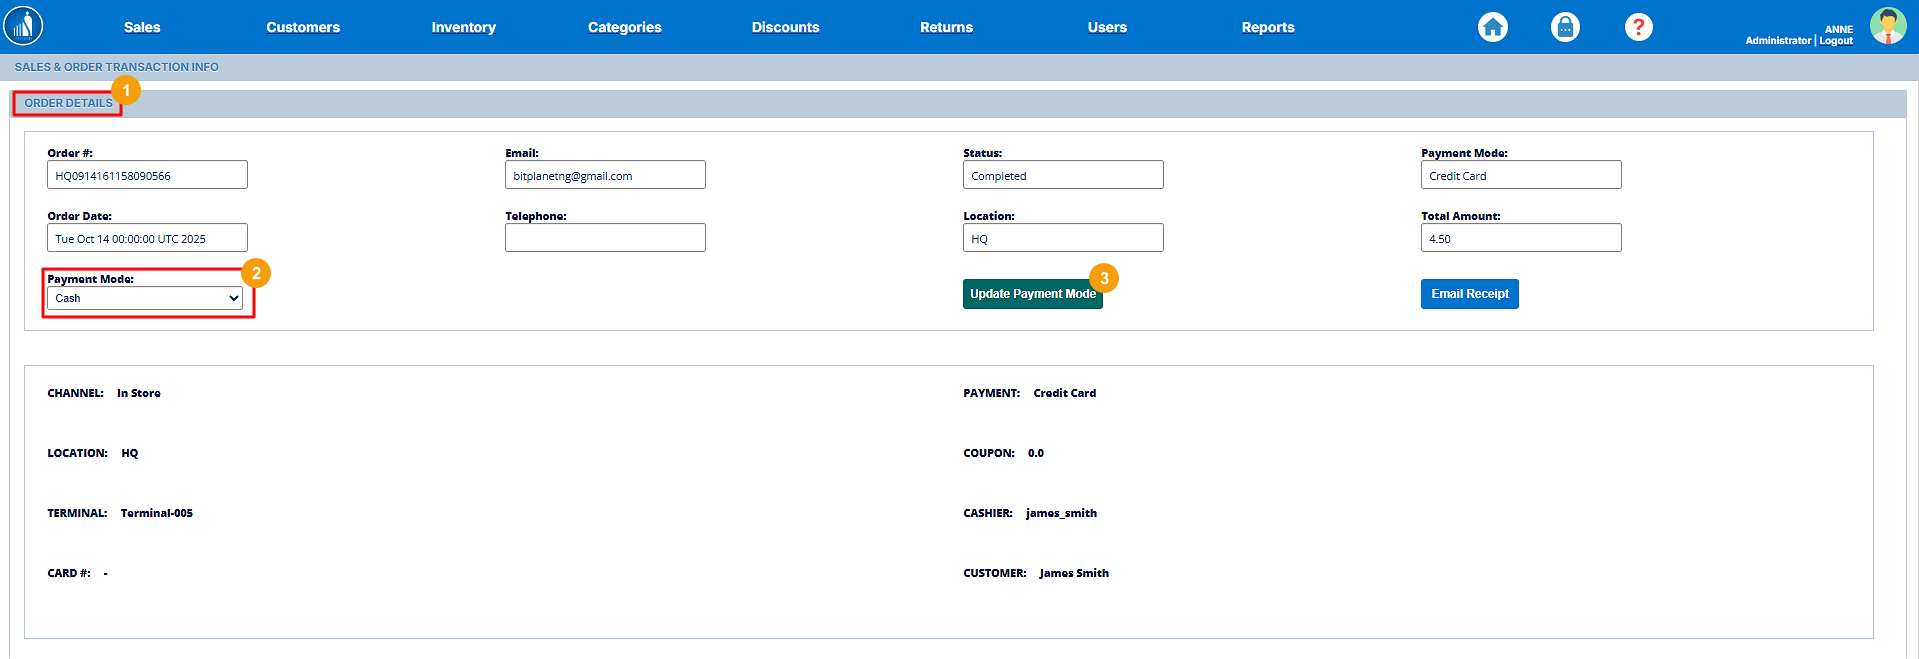
If the cashier or the customer selects an incorrect payment mode while placing the order or generating the receipt, they can update it from the Order Details page as follows:
1. Go to the Order Details page as specified in the previous section.
2. Select the new payment mode.
3. Click on the Update Payment Mode button.
Email Receipt to the Recipient
You can send the order receipt to the customer from the Order Details page as follows:
1. Go to the Order Details as specified in the above section.
2. Click on Email Receipt.
Syncing to QuickBooks
The software is connected to QuickBooks, hence it automatically pushes the transactions to it (if configured properly). But if, for some reason, it fails to do so, you can manually push the transactions to QuickBooks as follows:
1. Go to the Sales tab.
2. If there are pending transactions, click on the Sync QB button.
The pending transactions will start syncing to QuickBooks.
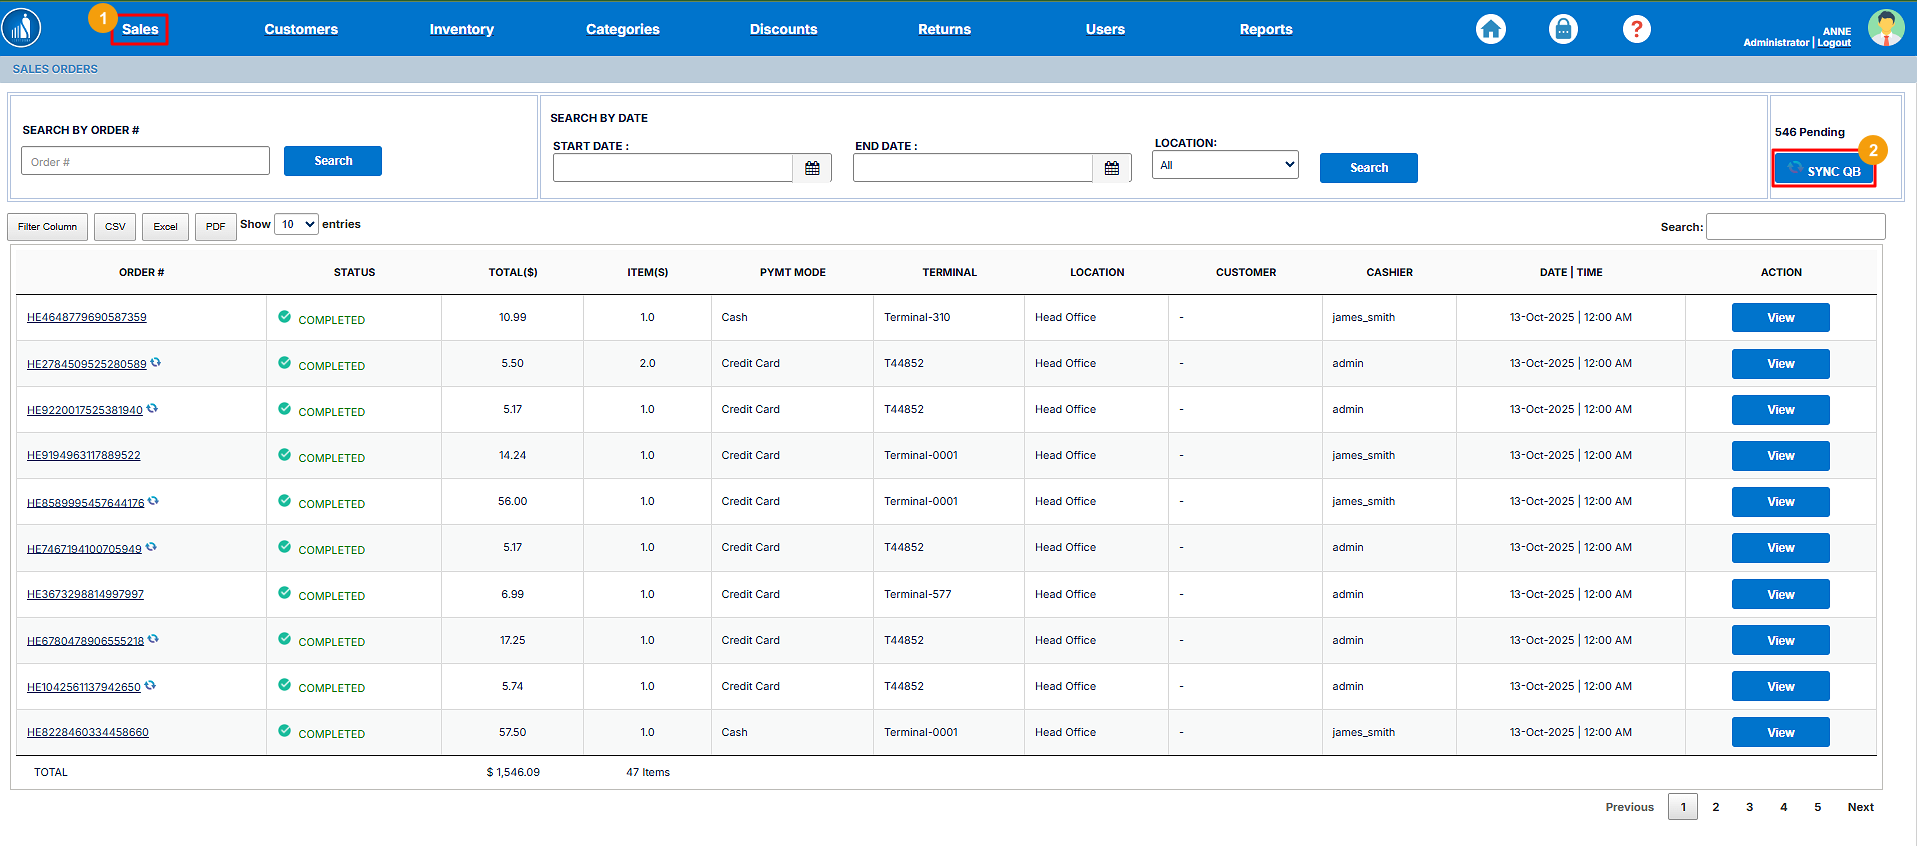
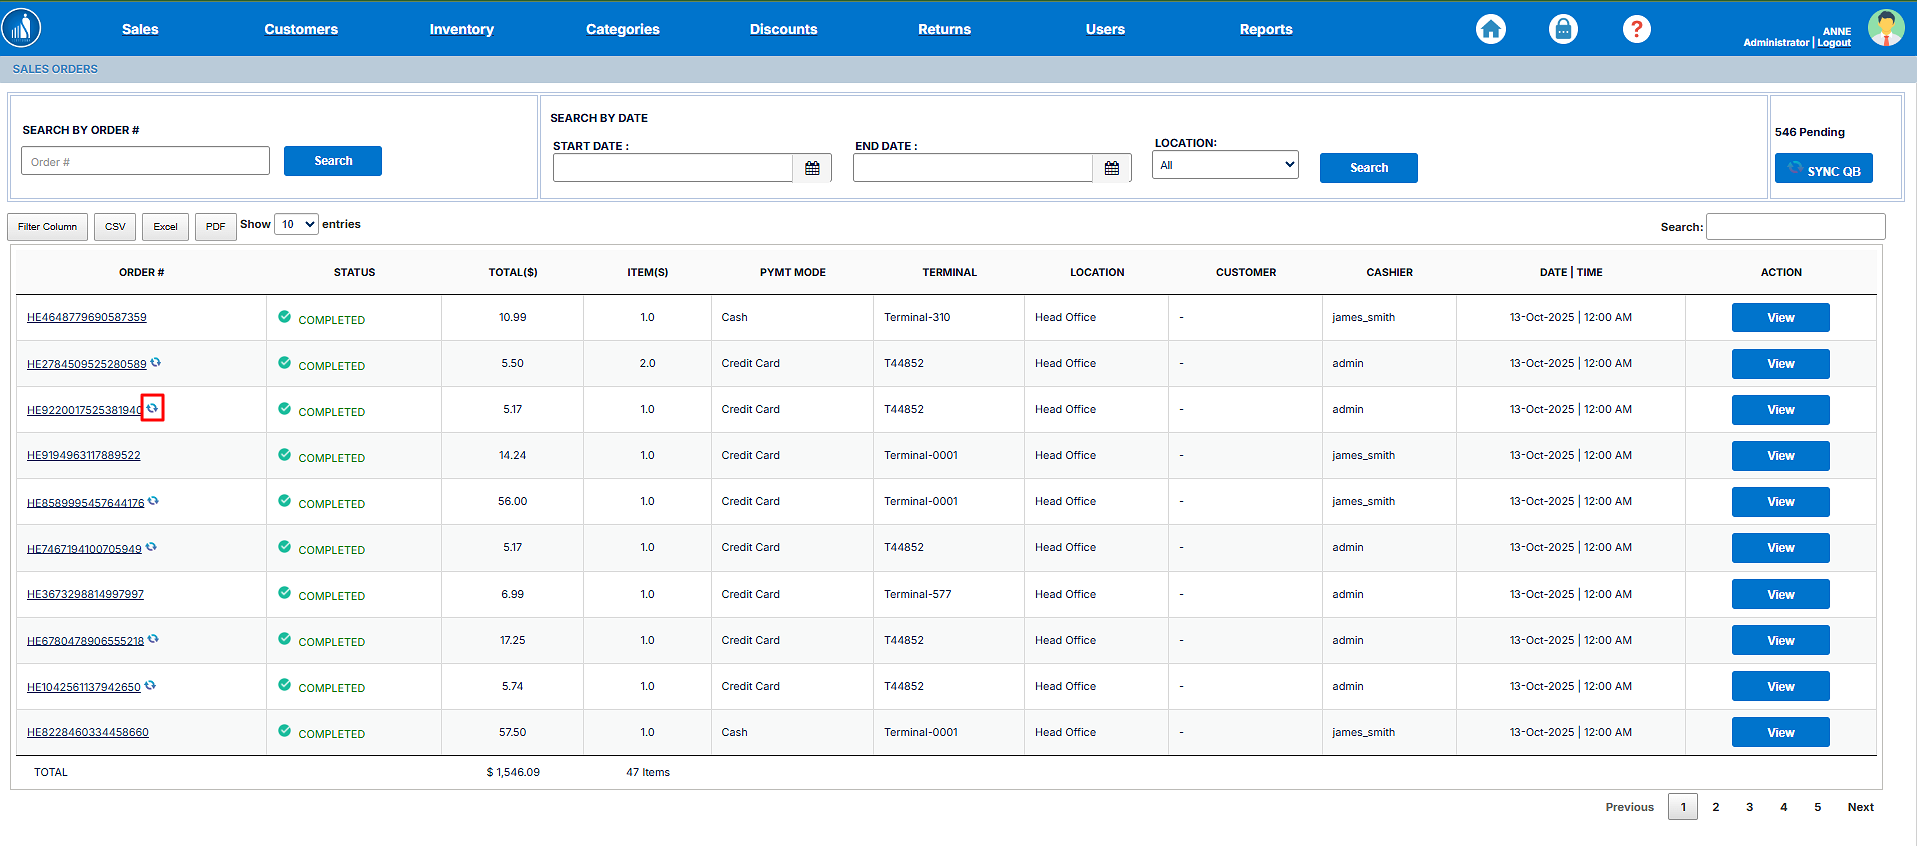
Please note that if the software is working fine and QB is appropriately configured, you’ll see zero pending transactions. Also, the icon annotated in the following image shows that the transaction has been synced to QuickBooks:
Exporting Sales Data
Scantranx allows you to export your sales data as a CSV, Excel or a PDF file. You can do so as follows:
1. Go to the Sales tab.
2. Click on the CSV, Excel or PDF button as per your preference.
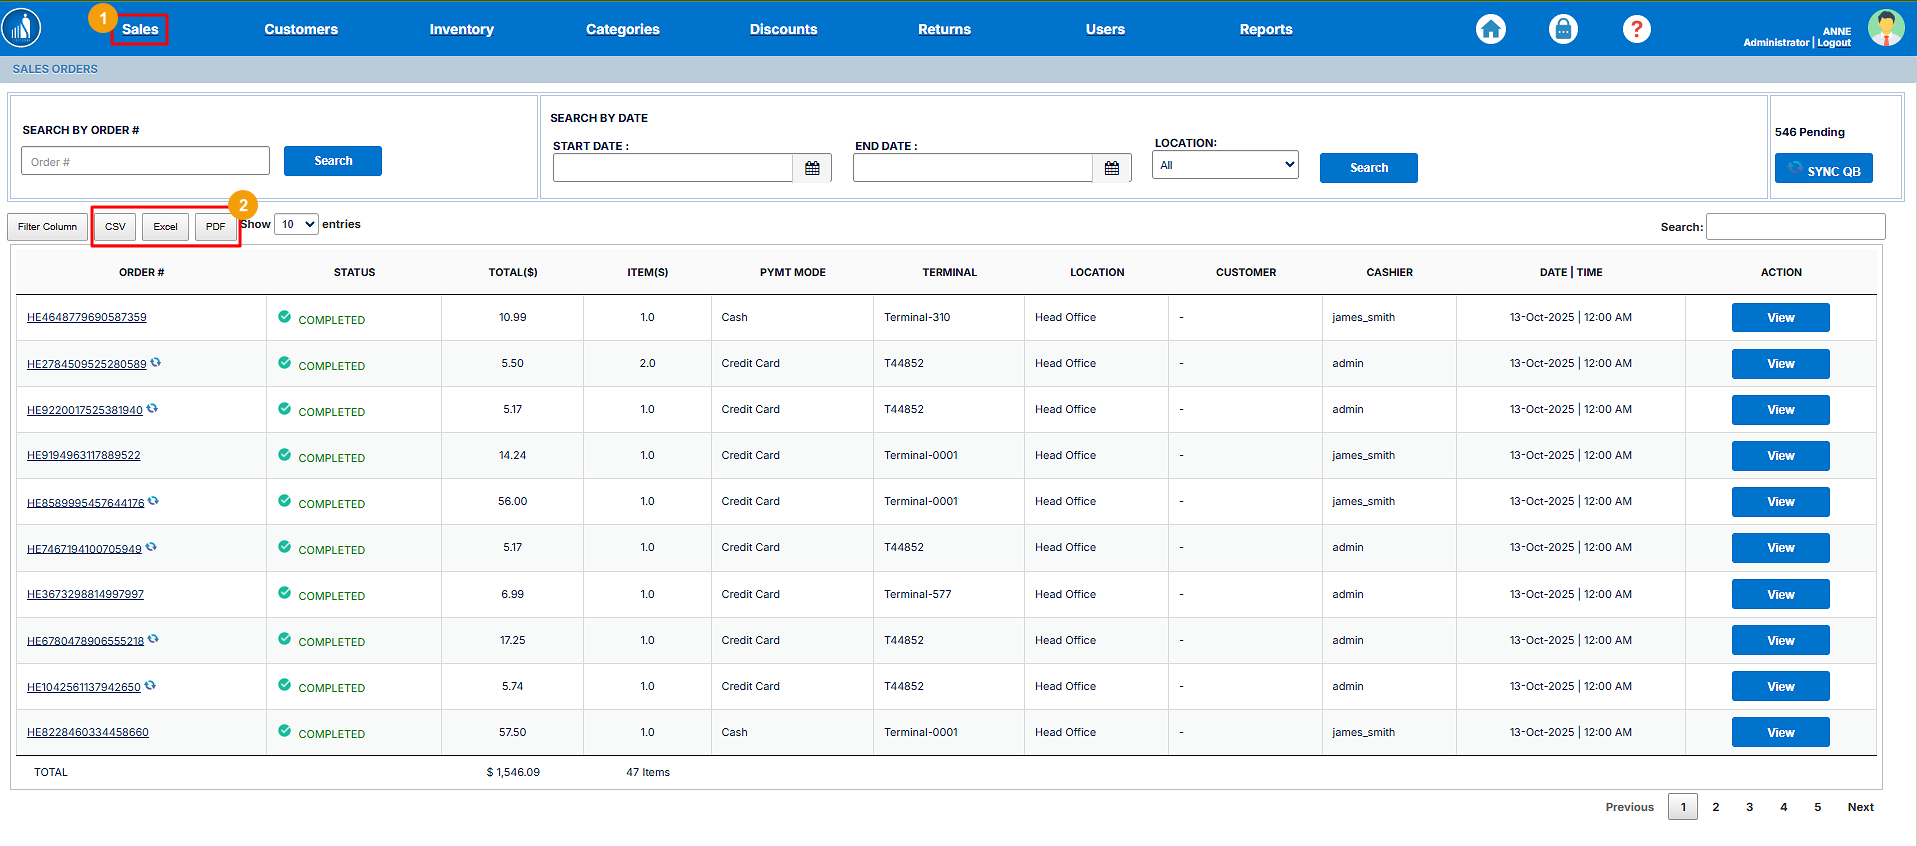
The file will be transferred to your local machine.